

Toggle in SwiftUI is among the most used views that it permits customers to change between two states, both on or off. This management is a good way to offer a easy and intuitive interface on your customers, making it a preferred selection for a lot of builders.For instance, you may use a toggle in your app to activate and off sure options, or to change between completely different modes or choices. Toggle may be very simple to implement in your SwiftUI purposes. With the ToggleStyle protocol, you possibly can create toggles that match your app’s design and branding.
On this tutorial, I’ll stroll you thru this Toggle view and present you tips on how to construct a number of customized toggles utilizing ToggleStyle.
The Fundamentals of Toggle
There are a number of methods to make use of the Toggle view in SwiftUI. The fundamental utilization is like beneath:
|
struct ContentView: View { @State personal var isEnabled = false
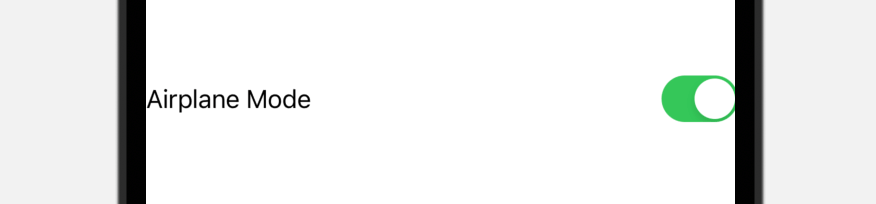
var physique: some View { Toggle(“Airplane Mode”, isOn: $isEnabled) } } |
Right here, we initialize a Toggle view with a textual content description and a binding. The state of the toggle is managed by the state variable. This renders a fundamental toggle with a textual content label as proven above.
If you wish to customise the textual content model, Toggle additionally supplies an one other initializer. You may set the visible look of the Textual content view within the closure like this:
|
Toggle(isOn: $isEnabled) { Textual content(“Airplane mode”) .font(.system(.title, design: .rounded)) .daring() } |
You may additional customise the outline to incorporate a picture like this:
|
Toggle(isOn: $isEnabled) { HStack { Textual content(“Airplane mode”) Picture(systemName: “airplane”)
} .font(.system(dimension: 20)) } |
This ends in a swap with a extra visually interesting design.

Altering the Toggle Model
By default, the Toggle view makes use of the swap model. You need to use the .toggleStyle modifier to vary the model from swap to button:
Say, if you wish to create a bookmark button, you possibly can create it utilizing the code beneath:
|
struct ContentView: View { @State personal var isBookmarked = false
var physique: some View { Toggle(isOn: $isBookmarked) { Picture(systemName: isBookmarked ? “bookmark.fill” : “bookmark”) .font(.system(dimension: 50)) } .tint(.inexperienced) .toggleStyle(.button) .clipShape(Circle()) } } |
The utilization may be very related besides that we inform Toggle to make use of the .button toggle model utilizing the .toggleStyle modifier. On this case, as an alternative of displaying the toggle as a swap, SwiftUI exhibits a button that alters its look relying on the state.

Utilizing ToggleStyle to Create a Customized Toggle
Usually, the default toggle model is ample, however there could also be cases the place you need to create a customized model to match the aesthetics of your app higher. Now let’s see tips on how to create our personal customized toggle. In short, you undertake the ToggleStyle protocol and implement the required makeBody(configuration:) perform to create your personal model:
|
struct CustomToggleStyle: ToggleStyle { func makeBody(configuration: Configuration) –> some View { // Your implementation } } |
Let’s begin with a easy job. We’re going to assemble a toggle swap with a customizable background shade and image.
To try this, we create a brand new struct named SymbolToggleStyle that conforms to the ToggleStyle protocol:
|
1 2 3 4 5 6 7 8 9 10 11 12 13 14 15 16 17 18 19 20 21 22 23 24 25 26 27 28 29 30 31 32 33 |
struct SymbolToggleStyle: ToggleStyle {
var systemImage: String = “checkmark” var activeColor: Shade = .inexperienced
func makeBody(configuration: Configuration) –> some View { HStack { configuration.label
Spacer()
RoundedRectangle(cornerRadius: 30) .fill(configuration.isOn ? activeColor : Shade(.systemGray5)) .overlay { Circle() .fill(.white) .padding(3) .overlay { Picture(systemName: systemImage) .foregroundColor(configuration.isOn ? activeColor : Shade(.systemGray5)) } .offset(x: configuration.isOn ? 10 : –10)
} .body(width: 50, top: 32) .onTapGesture { withAnimation(.spring()) { configuration.isOn.toggle() } } } } } |
The struct takes in two parameters: one is the picture title of the image and the opposite is the colour of the swap. Within the makeBody perform, we construct the toggle from the bottom up. This contains inserting the textual content label on one aspect and the swap on the opposite.
The configuration parameter offers us two items of knowledge: the textual content label (i.e. configuration.label) and the state (i.e. configuration.isOn) of the toggle. Within the code above, we prepare the textual content label and the rounded rectangle utilizing HStack. We constructed the swap by overlaying a circle on high of it. To show a logo, we additional overlay a picture view on high of the circle. By default, the picture is about to show a checkmark.
As talked about, we truly create the swap from scratch. This is the reason we have to deal with the faucet gesture and toggle the state of the swap. And, when the state adjustments, we transfer the circle by altering the offset worth.
To make use of this practice toggle model, we are able to apply the toggleStyle modifier like this:
|
Toggle(isOn: $isEnabled) { Textual content(“Airplane mode”) } .toggleStyle(SymbolToggleStyle(systemImage: “airplane”, activeColor: .purple)) |
This creates a toggle utilizing the SymbolToggleStyle.
Creating an Animated Picture Toggle
Now allow us to assemble one other toggle model that exhibits completely different photos for its enabled and disabled states. We’ll use these two photos for the challenge:
When you downloaded the photographs, import them to the asset catalog of your SwiftUI challenge. We then create a brand new toggle model like this:
|
1 2 3 4 5 6 7 8 9 10 11 12 13 14 15 16 17 18 19 20 21 22 23 24 25 26 27 28 29 30 31 32 |
struct ImageToggleStyle: ToggleStyle {
var onImage = “darkish” var offImage = “mild”
func makeBody(configuration: Configuration) –> some View {
HStack { configuration.label
Spacer()
RoundedRectangle(cornerRadius: 30) .fill(configuration.isOn ? .black : Shade(.systemGray5)) .overlay { Picture(configuration.isOn ? onImage : offImage) .resizable() .scaledToFill() .clipShape(Circle()) .padding(5) .rotationEffect(.levels(configuration.isOn ? 0 : –360)) .offset(x: configuration.isOn ? 10 : –10) } .body(width: 50, top: 32) .onTapGesture { withAnimation(.spring()) { configuration.isOn.toggle() } } } } } |
This ImageToggleStyle struct accepts two parameters for the ON & OFF photos. The implementation of the swap is similar to that we mentioned earlier than. As a substitute of utilizing a Circle view to create the swap, we use a picture view to show the ON & OFF photos.
We additionally added the rotationEffect modifier to animate the transition of the swap between the states.
Once more, to make use of this toggle model, you possibly can merely connect the .toggleStyle modifier to the Toggle view. Right here is an instance:
|
VStack { Toggle(isOn: $isEnabled) { Textual content(“Mild/Darkish mode”) .foregroundColor(isEnabled ? .white : .black) } .toggleStyle(ImageToggleStyle()) .padding() } .body(maxWidth: .infinity, maxHeight: .infinity) .background(isEnabled ? .black.opacity(0.6) : .white) |
Accessing the Toggle Model with Ease
To simplify the entry of the customized toggle model, you possibly can add a static variable in an extension to ToggleStyle as follows:
|
extension ToggleStyle the place Self == ImageToggleStyle {
static var picture: ImageToggleStyle { .init() } } |
On this case, you possibly can apply the toggle model utilizing the dot syntax:
|
Toggle(isOn: $isEnabled) { Textual content(“Mild/Darkish mode”) .foregroundColor(isEnabled ? .white : .black) } .toggleStyle(.picture) |
What’s Subsequent
On this tutorial, we’ve confirmed you the strategies of making customized toggle types in SwiftUI. With the assistance of the ToggleStyle protocol, you possibly can craft visually interesting toggles that stand out from the group. For those who’re desperate to study extra about SwiftUI and the ToggleStyle protocol, you’ll want to try our “Mastering SwiftUI” e-book for much more ideas and tips, plus full supply code.
