
When you’re searching for a sustainable technique to put together sizzling meals in distant or off-grid areas, a DIY photo voltaic oven is the answer you’re searching for.
It lets you prepare dinner meals outdoor effectively, utilizing solely the vitality from the solar!
You’ll be able to construct a low-cost, moveable DIY photo voltaic oven with the right supplies. Don’t fear; it’s each simple to construct and use.
On this article, we offer you a step-by-step information on the best way to construct your photo voltaic oven.
We cowl the supplies you’ll want for the challenge and the steps you will need to take to construct a sensible DIY photo voltaic oven.
Moreover, we offer a couple of tips about the best way to use your photo voltaic oven effectively.
Climatebiz consultants design, analysis, fact-check & edit all work meticulously.
Affiliate Disclaimer
Climatebiz is reader-supported. We could earn an affiliate fee whenever you purchase by means of hyperlinks on our web site.
DELTA Max + 110W $600 Off
Use our coupon code to seize this restricted deal from EcoFlow whereas it lasts. Again up your property throughout energy outages with the DELTA Max + 110W photo voltaic panel.
What Do I Want To Construct A Photo voltaic Oven?
Right here’s a listing of all of the supplies you’ll want for constructing your DIY photo voltaic oven:
If you wish to make investments extra money and time to construct a extra elaborate photo voltaic oven, you’ll additionally want wooden to construct a body, instruments to chop the wooden, a drill, and screws.
Parts of a photo voltaic oven
A easy photo voltaic oven usually consists of a cardboard field, aluminum foil, a bit of glass or Plexiglas, insulation or cotton padding, a thermometer, and a body.
The field and the foil work collectively to mirror and take up daylight, trapping the warmth contained in the oven.
The glass or plexiglass retains the warmth trapped inside (with out blocking the daylight), whereas the insulation or cotton padding prevents warmth loss.
Moreover, some photo voltaic ovens additionally use reflectors to direct extra daylight into the oven.
Totally different designs
There’s all kinds of designs for photo voltaic ovens.
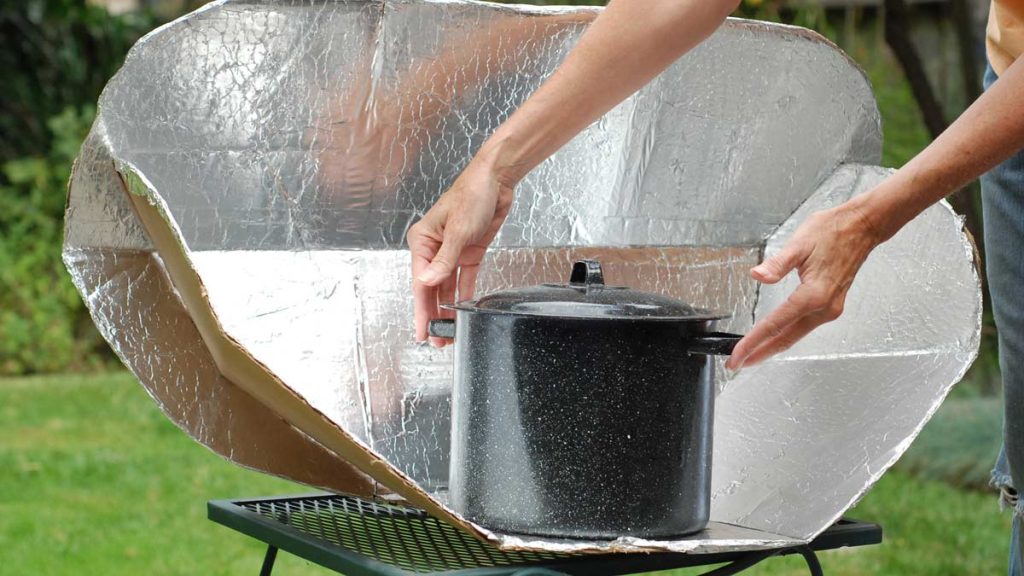
Probably the most easy design consists of a reflective materials (panel) put collectively in a approach that directs the daylight to a goal (the pan/meals). You’ll be able to name it the “sluggish cooker” of photo voltaic ovens, because it doesn’t lure the warmth “inside” the oven to hurry up the cooking course of.
Nevertheless, it may well create sufficient warmth to prepare dinner meals when you’re prepared to attend lengthy sufficient.
That is what it appears to be like like:
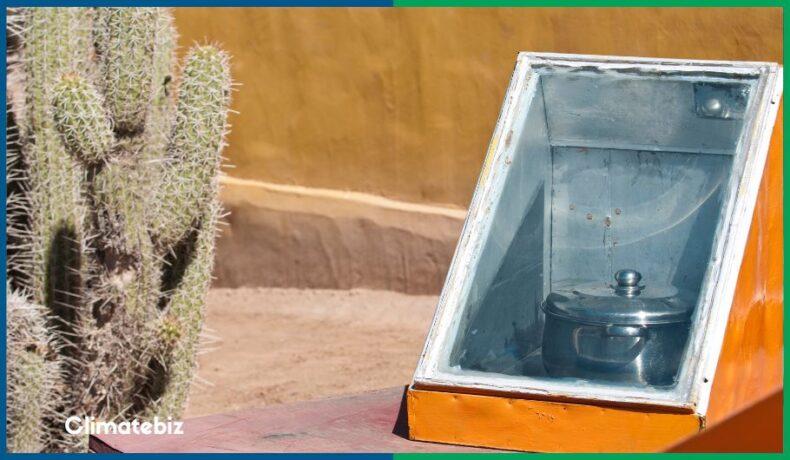
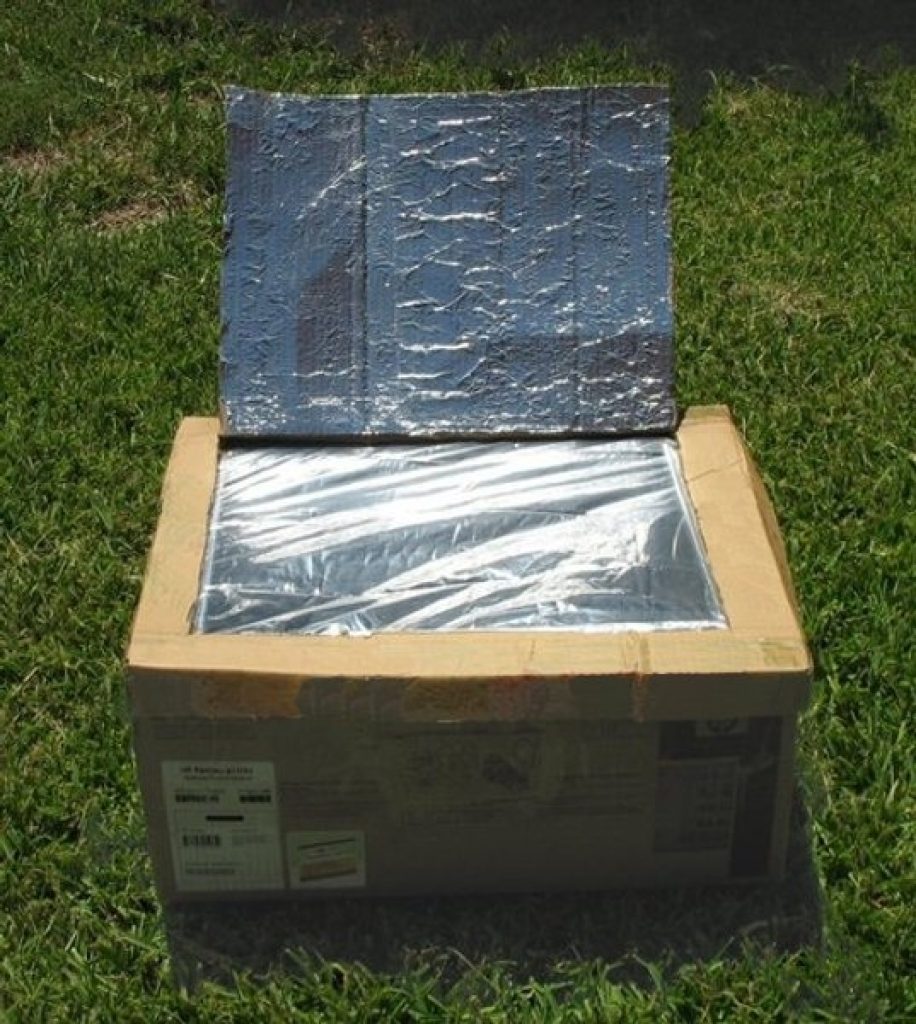
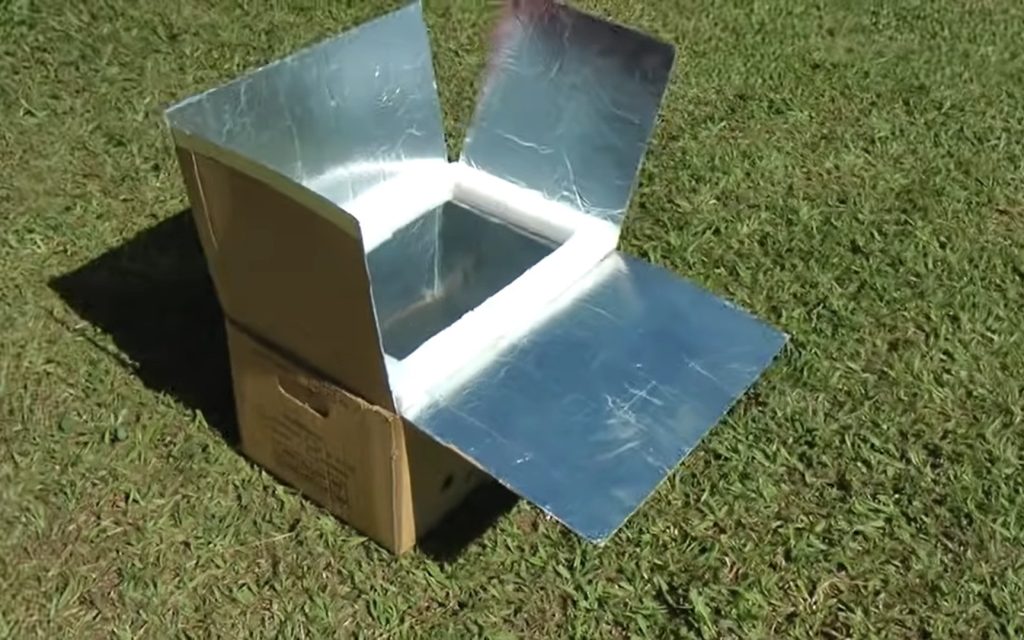
Now, suppose you’re searching for one thing extra intermediate-level. In that case, an ordinary DIY photo voltaic cooker design consists of a cardboard field lined with aluminum foil and a bit of glass (and even plastic wrap or baking luggage) on the highest.
Including flaps wrapped with reflecting materials could make it extra highly effective.
Right here’s an instance:
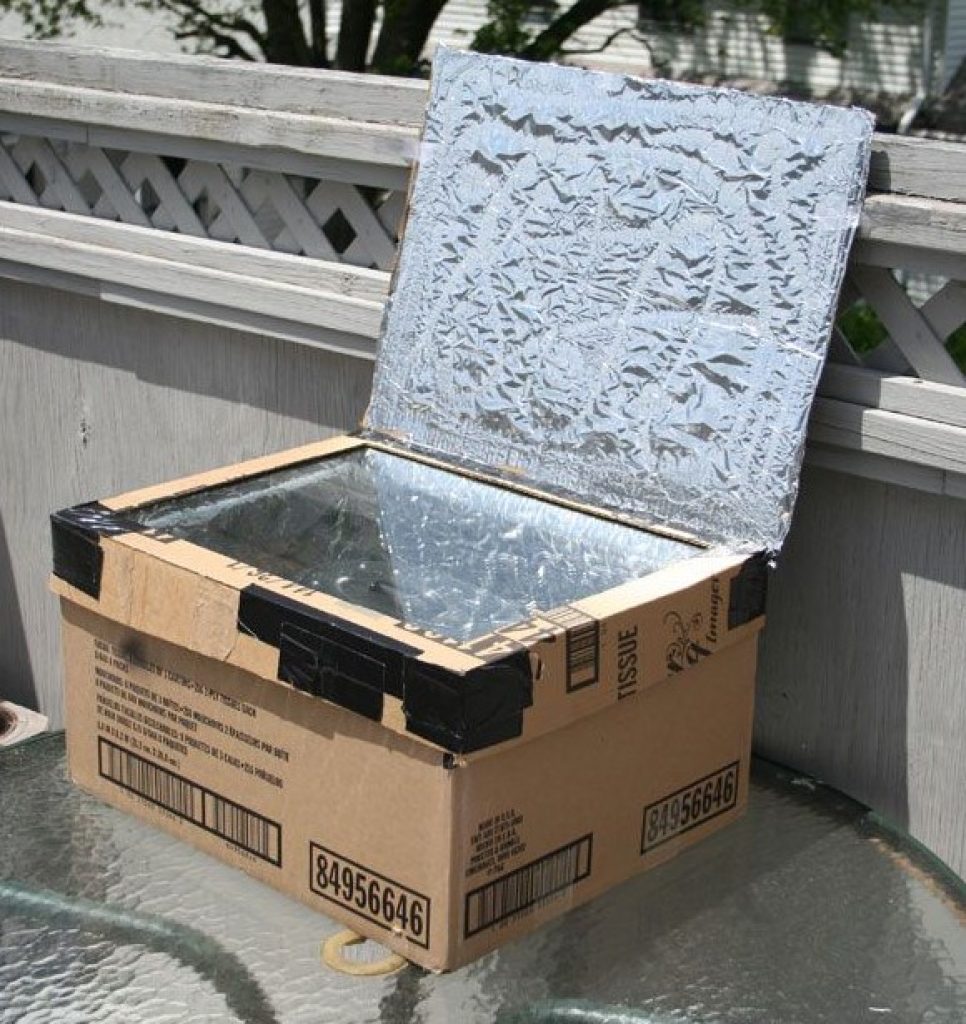
One of these oven is appropriate for primary cooking as it may well attain temperatures round 230ºF (110ºC) and as much as 250ºF (121ºC).
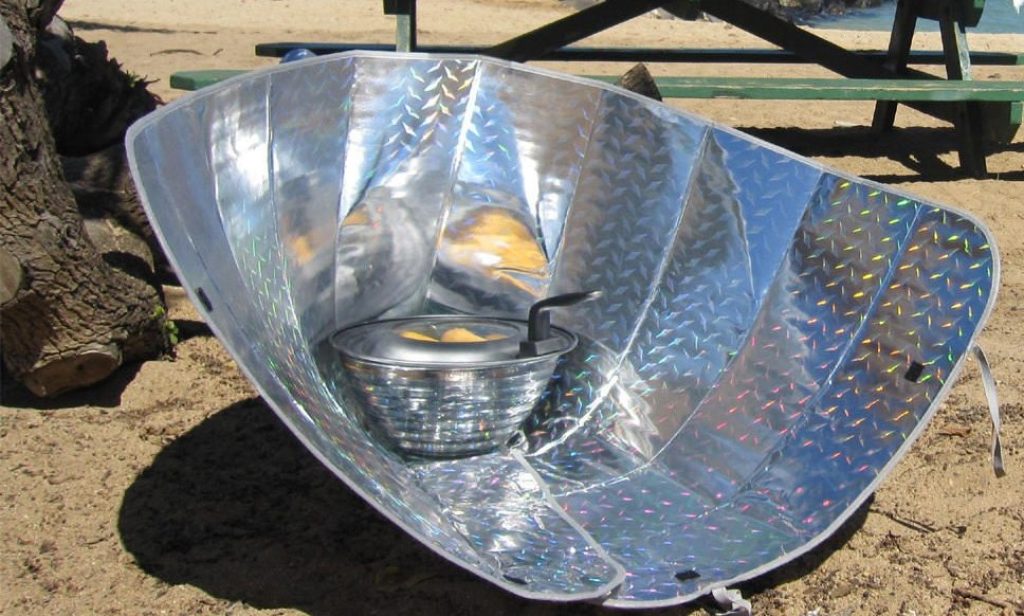
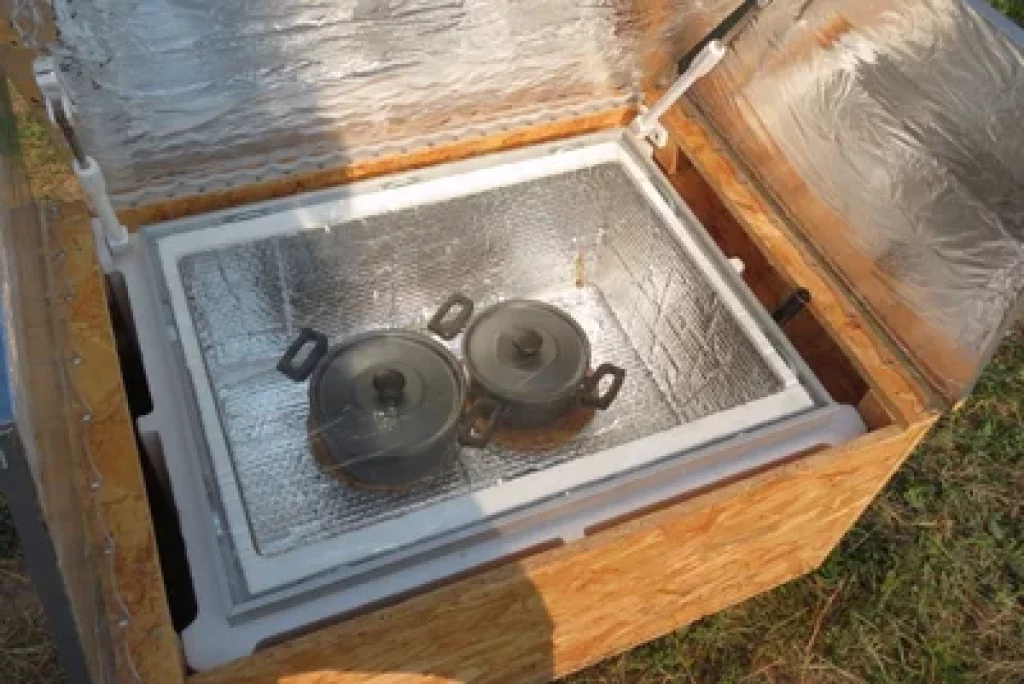
If you would like a extra sturdy and sturdy photo voltaic oven, you’ll be able to construct a picket body and use reflectors to direct extra daylight into the oven. This fashion, it may well attain temperatures over 300ºF (140ºC).
This design will assist you to prepare dinner extra complicated meals:

On this article, we current a easy DIY photo voltaic oven design that’ll allow you to perceive how photo voltaic ovens work. Moreover, we offer the instruments to create your individual photo voltaic oven design later.
How To Construct A DIY Photo voltaic Oven
Step 1: Planning
Like all DIY challenge, you must begin by organising a plan.
Work out the scale of your photo voltaic oven. It ought to be sufficiently big to suit the pan/pot/baking tray you propose to make use of.
For this challenge, you’ll want two cardboard packing containers (one will go inside the opposite, with some insulating materials between them).
After getting your required dimensions, it’s time to sketch your plan.
Step 2: Measuring and slicing
If you have already got the cardboard packing containers with the specified dimensions, nice. If not, you’ll want to chop them to match the proper dimensions. You should use aluminum duct tape to seal the sides/corners.
If the inside cardboard field has flaps, hold them. You’ll convert them into reflectors in a while. If not, you can also make flaps utilizing one other cardboard field. Merely minimize out the size and use duct tape as hinges.
Step 3: Making ready the outer and inside packing containers
The outer (bigger) cardboard field is the principle physique of this photo voltaic oven, so it ought to be sturdy sufficient. Alternatively, you’ll be able to construct a picket body because the outer field.
Use black spray paint to color the underside (inside) of the inside field. As soon as the paint is dry, cowl the within of the smaller field with aluminum foil (solely the edges, not the underside). If needed, use glue.
Step 4: Including insulation
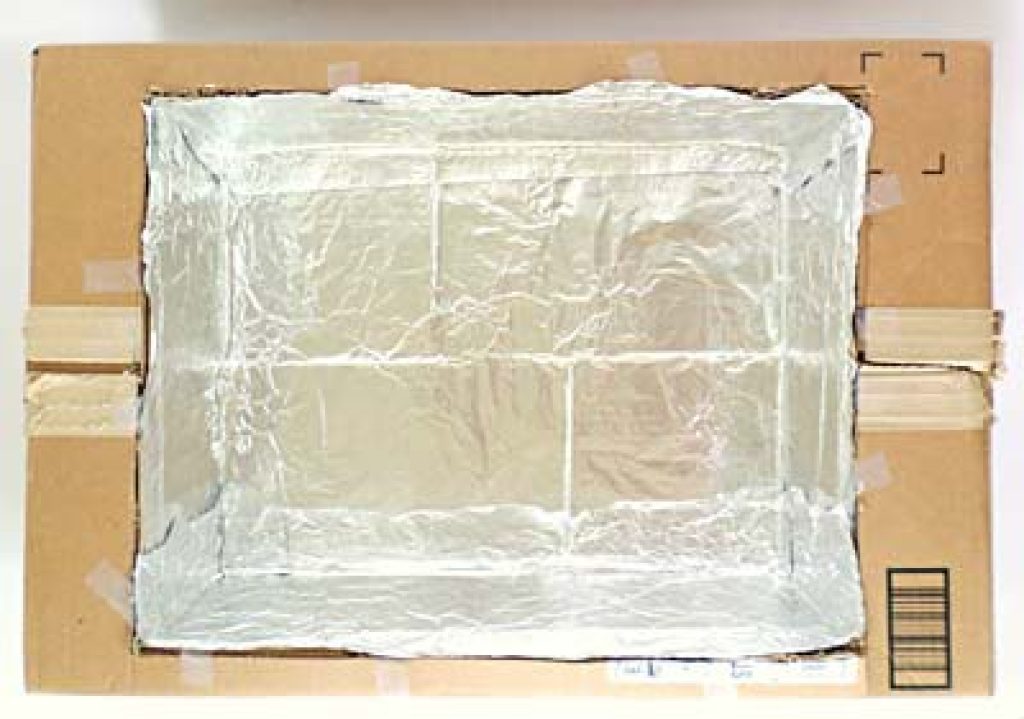
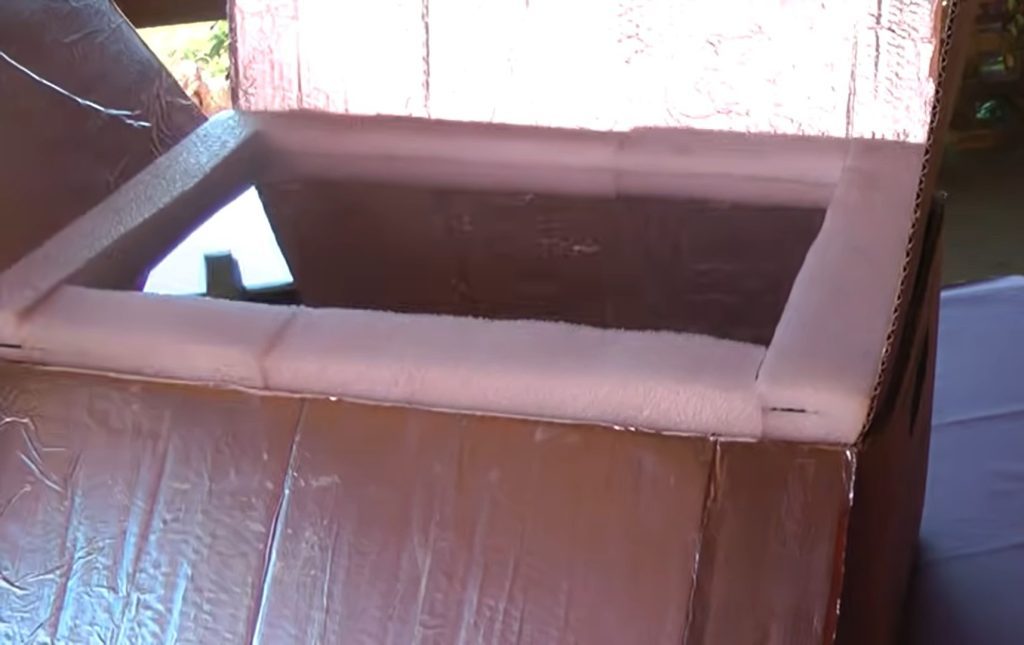
Place the smaller cardboard field contained in the bigger one, and fill your complete area between them with an insulating materials. Be certain to insulate the underside, too, not solely the edges. Add sufficient to make it tight – the inside field shouldn’t be unfastened contained in the bigger field.
You should use shredded paper, cotton padding, items of cardboard, or something that may act as a warmth insulator.
As soon as the insulation is finished, you need to use cardboard items to shut the “hole” between the 2 packing containers, so it basically turns into one field. At this level, it ought to look one thing like this:
Step 5: Creating reflecting flaps
Wrap the inside field’s flaps with aluminum foil to mirror extra daylight into the oven. If the field doesn’t have flaps, use one other cardboard field to chop items so you need to use them as reflectors.
Use aluminum duct tape to tape the flaps to the sides of the field so it acts as a hinge.
In the long run, it ought to look one thing like this:
Step 6: Make the highest with plexiglass, glass, or plastic
To maintain the warmth contained in the oven whereas letting the daylight in, you’ll must cowl the highest of the field with a clear materials, comparable to glass, plexiglass, and even plastic/plastic wrap.
When you select to make use of glass, you need to use styrofoam/polyethylene foam to construct a “body” for the piece of glass, like this:
When you don’t need to use a glass high, you’ll be able to cowl the highest of the oven with plastic wrap whenever you’re prepared to make use of it.
Step 7: Utilizing the photo voltaic oven
As soon as your photo voltaic oven is prepared, place it outdoors beneath direct daylight.
Modify the reflecting flaps in accordance with the place of the solar. Then, place the cooking pot containing the meals you need to prepare dinner within the heart of the oven.
Cowl the oven with the glass high (or with plastic wrap), and that’s it – the photo voltaic oven will do the remainder of the job!
You’ll be able to place a thermometer contained in the oven to watch its inner temperature.
9 Suggestions for utilizing a DIY photo voltaic oven
You’ll be able to take some measures to get probably the most out of your photo voltaic oven cooking expertise.
- Use black pans: Cowl them with lids or aluminum foil. Darkish-colored pots and pans will take up extra warmth from the solar and pace up the cooking course of.
- Placement is vital: Place the oven going through the solar and alter the reflectors to maximise daylight absorption.
- Monitor the temperature: Use a thermometer to watch the oven’s inner temperature.
- Preheating: Preheat the oven earlier than cooking —go away it beneath the solar for some time earlier than putting the meals. This can make sure the oven is sizzling sufficient whenever you place your meals.
- Begin cooking early within the day: One of the best time to prepare dinner with a photo voltaic oven is throughout the morning and early afternoon when the solar is at its strongest.
- Add additional insulation: If the oven’s temperature isn’t excessive sufficient to prepare dinner the meals, strive including extra insulation layers to the body.
- Prepare dinner in batches: To take advantage of the warmth, prepare dinner a number of gadgets concurrently (in case your photo voltaic oven is sufficiently big to suit a number of pans).
- Shield the oven from the wind: Wind can lower the temperature within the oven, so ensure that to put it in a spot topic to much less wind.
- Excessive temperatures: A photo voltaic oven can attain excessive temperatures, so watch out with the warmth whenever you open/take away the glass on high of the oven (such as you would with a standard oven).
Ultimate ideas
Photo voltaic ovens are an efficient and sustainable technique to prepare dinner meals with out electrical energy or fuel. What’s extra, they’re fairly simple to construct.
With the fitting supplies and a few spare time, you’ll be able to assemble your photo voltaic oven and begin making ready contemporary, home-cooked meals., all whereas saving electrical energy!
By following the steps outlined on this information, it is possible for you to to construct a DIY photo voltaic oven that’s environment friendly and easy to make use of.
So, begin constructing your photo voltaic oven as we speak and revel in the advantages of cooking with the solar’s energy!
Be happy to ask questions, share your ideas, and make recommendations concerning this matter within the remark part under!
