
After I began out growing iOS apps, 11 years in the past I put a number of apps on the App Retailer. Since they turned fewer and fewer because the earnings from them didn’t warrant updating them. Amongst these my most profitable one was iWoman, which I bought in 2015. My second-most-valuable (by way of income) remained my beloved SpeakerClock, the final app standing.
I had left SpeakerClock on-line for the primary purpose that it saved producing like a mean of $100 monthly, even with out me doing something on it. For that purpose, I didn’t need to make it free, however fairly put it to a comparatively excessive price ticket of $5. There’s additionally an In-App-Buy of one other $5. I figured “why kill the cow whereas it nonetheless produces some tasty milk”.
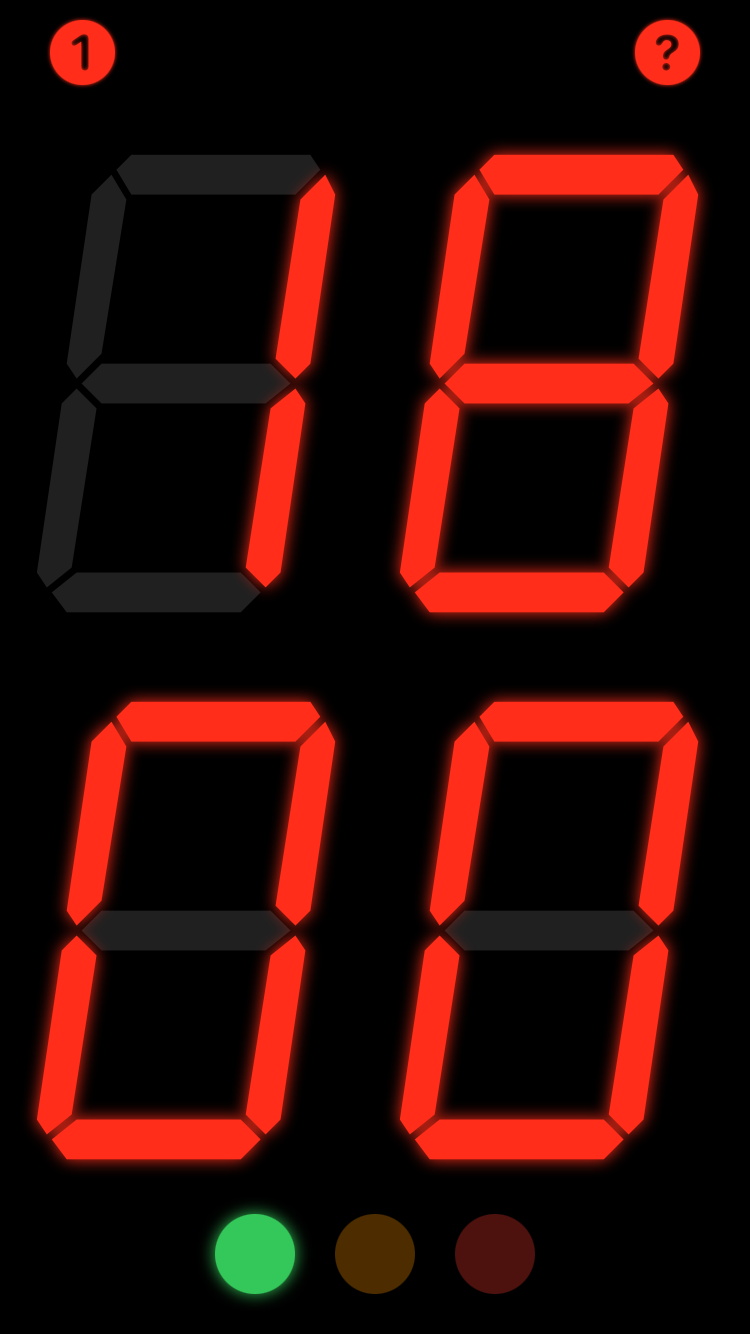
The opposite aspect impact of those value tags was that – I imagine – solely individuals who actually needed what the app was providing would truly buy it. My philosophy with this talking timer was to have the largest LED digits potential, with the performance that helps the talking model of TED Talks, which traditionally have defaulted to a most size of 18 minutes.
Some crashes launched by new iOS variations brought about me to do small bug fixing releases (for iOS 3 in 2010, iOS 5 in 2011, and 2017 for iOS 10). Additionally, trying again on the launch notes of these variations, I had made this precise promise:
“We now have completely modernised the code base in order that we will convey you some thrilling new options within the subsequent main launch”
However I didn’t lie with this assertion, a “subsequent main” launch would have been model 2.0. However I didn’t ever dare to show the model quantity up that top. I solely elevated the third digit of the model quantity.
Apple did power me to do a brand new construct finally, after they cracked down on apps which weren’t up to date in too lengthy a time. And the newest replace they did themselves, when the Apple certificates had expired and so they re-signed my app on their servers with out me doing something.
Enter SwiftUI
Over the previous couple of months, I’ve grown very keen on SwiftUI. Being a developer on Apple platforms for greater than a decade made me fairly uninterested in having to maintain writing the identical MVC code numerous instances. And that will solely get you want customary performance, nothing actually thrilling. So I jumped on the likelihood when one among my shoppers requested me to implement a brand new iOS Widget in SwiftUI, within the fall of 2020. Apple had turned to SwiftUI as the one manner you could possibly create such widgets due to SwiftUIs means to supply and protect a static view hierarchy which the system might present to the person at sure factors in a timeline with out substantial energy utilization.
My consumer was completely satisfied in regards to the end result and so I used to be tasked with the following stage of SwiftUI improvement. I wanted to implement a watchOS app, additionally solely in SwiftUI. Improvement was fairly much like the widget, however this time I additionally wanted to take care of person interplay and communication with the iOS counterpart app. That every one took some a couple of months greater than the widget, however once more elevated my SwiftUI expertise tremendously.
After having delivered the watch app, I had somewhat further time out there to do one thing for myself. I do have another concepts for apps, however my ideas turned to SpeakerClock. I figured that this extremely customized UI would lend itself properly to be applied in SwiftUI.
Paths in Shapes
Crucial asset within the legacy code was the drawing of the large purple LED digits and the way they prepare themselves in portrait versus panorama, in a pleasant animation. So my first SwiftUI view was one which had a Path factor with the SwiftUI instructions including the trail parts to make up the person bars of the LED. My first error right here involved utilizing a GeometryReader to find out the size of the trail. The LED digits have a set facet ratio and the drawing coordinates are based mostly on these.
struct LEDDigit: View
{
   var digit: Int? = nil

   var physique: some View
   {
      GeometryReader { proxy in
         let (w, h) = proxy.unitSize

         // prime horizontal line
         Path { path in
            path.transfer(to: CGPoint(x: 24 * w, y: 7 * h))
            path.addLine(to: CGPoint(x: 60 * w, y: 7 * h))
            path.addLine(to: CGPoint(x: 62 * w, y: 10 * h))
            path.addLine(to: CGPoint(x: 57 * w, y: 15 * h))
            path.addLine(to: CGPoint(x: 24 * w, y: 15 * h))
            path.addLine(to: CGPoint(x: 21 * w, y: 10 * h))
            path.closeSubpath()
         }
         .activeLEDEffect(when: [0, 2, 3, 5, 7, 8, 9].accommodates(digit))
         ...
}
Whereas this produces the proper output, it causes the person Paths to animate individually when rotating the gadget. I solved this drawback by transferring the person path’s code right into a Form the place I’m including the bars solely based mostly on whether or not I’m searching for the lively or inactive LED parts. The trail(in rect: CGRect) operate arms us the required dimension, so we don’t a GeometryReader any extra.
struct LEDDigitShape: Form
{
   var digit: Int? = nil
   var isActive: Bool

   func path(in rect: CGRect) -> Path
   {
      let w = rect.dimension.width / 73
      let h = rect.dimension.top / 110

      var path = Path()

      // prime horizontal line

      if [0, 2, 3, 5, 7, 8, 9].accommodates(digit) == isActive
      {
         path.transfer(to: CGPoint(x: 24 * w, y: 7 * h))
         path.addLine(to: CGPoint(x: 60 * w, y: 7 * h))
         path.addLine(to: CGPoint(x: 62 * w, y: 10 * h))
         path.addLine(to: CGPoint(x: 57 * w, y: 15 * h))
         path.addLine(to: CGPoint(x: 24 * w, y: 15 * h))
         path.addLine(to: CGPoint(x: 21 * w, y: 10 * h))
         path.closeSubpath()
      }
      ...
}
That is used such:
struct LEDDigit: View
{
   var digit: Int? = nil

   var physique: some View
   {
   ZStack
   {
      LEDDigitShape(digit: digit, dot: dot, isActive: false)
         .activeLEDEffect(isActive: false)
      LEDDigitShape(digit: digit, dot: dot, isActive: true)
         .activeLEDEffect(isActive: true)
   }
}
The 2 members of the ZStack draw all of the inactive LED parts behind the lively LED parts. It nonetheless wanted to be two Shapes as a result of one form can solely have a single drawing model. The inactive parts are merely stuffed in a grey. The lively parts are crammed with purple and have a purple glow round them simulating some radiance.
With this strategy a digit is at all times drawn in its entirety which lends itself to clean resizing.
Structure and Orientation Woes
The following step was to combination a number of LED digits and lay them out over the display screen with completely different positions for panorama and portrait orientations, with a clean animation whenever you rotate the gadget.


I’ve principally two layouts:
- Hour digits, Colon, Minute digits (in a
HStack)- in horizontal structure with the outer sides touching the secure space insets - A
VStackof Hour digits and Minute digits – in vertical structure
Sounds straightforward, however my makes an attempt with HStacks and VStacks failed miserably. In the beginning of the rotation animation the digits would at all times get a really small body increasing into the ultimate one.
I can solely think about that someway the SwiftUI structure system doesn’t do not forget that these are the identical views. So I attempted giving them static identifiers and I additionally tried geometry matching. However I couldn’t shake these animation artefacts. There should be some piece lacking in my understanding about view id.
Ultimately I got here again to doing my very own structure inside a GeometryReader, setting body’s width/top and acceptable offsets (i.e. translation) for particular person parts. This works very properly and in addition lets me have a separate animation for the opacity of the colon.
The colon sticks to the correct aspect of the hour digits and disappears in portrait structure. By sorting view modifiers in a sure manner I used to be capable of get this impact that the colon fades in with a slight delay.
var physique: some View
{
   GeometryReader { proxy in

   let digitSize = self.digitSize(proxy: proxy)
   let colonSize = self.colonSize(proxy: proxy)
   let centeringOffset = self.centeringOffset(proxy: proxy)
   let isLandscape = proxy.isLandscape

   let timerSize = self.timerSize(proxy: proxy)

   Group
   {
      LEDNumber(worth: mannequin.countdown.minutes)
      .body(width: digitSize.width * 2, top: digitSize.top)
      .animation(nil)

      LEDColon()
      .body(width: colonSize.width, top: colonSize.top)
      .offset(x: digitSize.width * 2, y: 0)
      .animation(nil)
      .opacity(isLandscape ? 1 : 0)
      .animation(isPadOrPhone ? (isLandscape ? .easeInOut.delay(0.2)
                              : .easeInOut) : nil)

      LEDNumber(worth: mannequin.countdown.seconds)
      .body(width: digitSize.width * 2, top: digitSize.top)
      .offset(x: isLandscape ? digitSize.width * 2 + colonSize.width : 0,
              y: isLandscape ? 0 : digitSize.top)
      .animation(nil)
   }
   .offset(x: centeringOffset.width,
           y: centeringOffset.top)
You’ll be able to see that I’m particularly disabling animation with .animation(nil) for probably the most elements as a result of I discovered that the animation in any other case is at all times out of sync with the rotation resizing animation. The LED colon however has its personal animation with a further delay of 0.2 seconds.
The second purpose why I explicitly disabled animations is as a result of on the Mac model these animations would lag behind the resizing of the app’s window. This resizing additionally switches between each layouts relying on the way you drag the window nook, form of like “responsive design” as we’ve seen on HTML net pages. Extra on Mac issues additional down beneath.
Multi-Modal Buttons
One other problem that had me attempt a number of approaches involved the preset buttons (prime left) and visitors mild buttons (heart backside). These buttons have a distinct operate for a single faucet (choose) versus an extended press (set).
The primary drawback is that you just can not have a easy .onLongPressGesture as a result of this prevents the traditional faucets from being dealt with. One strategy is to have a .simultaneousGesture for the lengthy press, however then the faucet motion is executed proper (i.e. “simultaneous”) after the lengthy press motion for those who raise the finger over the button. The opposite strategy is to make use of a .highPriorityGesture which once more disables the built-in faucet.
I ended up with the next strategy which makes use of the gesture masks to selectively disable the lengthy press gesture if there isn’t a lengthy press motion and to disable the faucet gesture if an extended press was detected.
struct LEDButton<Content material: View>: View
{
   var motion: ()->()
   var longPressAction: (()->())?
   @ViewBuilder var content material: ()->Content material

   @State fileprivate var didLongPress = false

   var physique: some View
   {
      Button(motion: {}, label: content material)  // should have empty motion
      .contentShape(Circle())
      .buttonStyle(PlainButtonStyle())   // wanted for Mac
      .simultaneousGesture(LongPressGesture().onEnded({ _ in
         didLongPress = true
         longPressAction!()
         didLongPress = false
      }), together with: longPressAction != nil ? .all : .subviews)
      .highPriorityGesture(TapGesture().onEnded({ _ in
         motion()
      }), together with: didLongPress ? .subviews : .all)
   }
}
This strategy makes use of a customized TapGesture in tandem with the LongPressGesture. A @State variable retains monitor of the lengthy press. We do must reset didLongPress to false or else all subsequent faucets would proceed to be ignored. I discovered that I don’t want a dispatch async for placing it again to false.
I imagine that the rationale for that’s that the primary setting of the variable causes the physique to be up to date and thus the together with: to disable the faucet gesture whereas in progress. Thus the faucet doesn’t hearth upon releasing the lengthy press. Good to know: The .all allows the gesture and the .subviews disables a gesture.
Opposite to different approaches I’ve seen on the web this strategy preserves the usual conduct of Button for highlighting, When you press a customized button like this, it makes it barely clear.
A Mac Model – For Free?
The massive promise of SwiftUI is that you’d get a Mac model of your app for little further work, successfully “without cost”. So I made a decision to place this to the check additionally produce a macOS model. I set the focused gadgets to iPhone, iPad, Mac and selected the “Optimize Interface for Mac” as a result of that sounded to me like the higher end result.

This optimized mode brought about some points for my customized buttons, as a result of they bought changed with empty spherical rects destroying my customized look. You’ll be able to forestall this modification by including .buttonStyle(PlainButtonStyle()).
Aside from this my code actually did run as a local Mac app fairly properly. Behind the scenes although it’s all Mac Catalyst. As I perceive it, meaning UIKit remains to be on the helm, on Mac only a macOS model of it.
I left the code signing settings alone as I needed to have customers be capable to set up the Mac and iOS variations with the identical buy. This “common buy” is enabled by having the identical bundle identifier for each variations.

Some very minor tweaks had been required for adjusting some minimal and most button sizes. There’s a bug on macOS that stumped me for some time. Solely on Mac I discovered that once I tapped in sure spots in my app this might trigger gestures to cease working. Then once I triggered a brand new structure by resizing the window, the whole lot returned again to regular.
My workaround for this was to connect the Pan Gesture (for setting the timer) solely to the LED digits. This fashion there isn’t a interference and all buttons proceed to work usually. The system may get confused by having too many conflicting gestures on prime of one another.
A side-effect of the Mac model is that you just begin to connect keyboard shortcuts to buttons. This was additionally a purpose why I needed to get Button to work with faucet and lengthy press versus making a customized view that’s not a button.
let title = "(index+1)"

PresetButton()
.keyboardShortcut(KeyEquivalent(title.first!), modifiers: [.command])
This fashion you may set off the preset buttons additionally with COMMAND plus quantity. And never only for the Mac app, however that works for iPads with hooked up keyboard as nicely.
That bought me pondering, that possibly it might be nice to permit the house bar to cease/begin the timer, like we’re used to from video gamers. For that objective I’ve an empty utterly black button behind the LED digits:
Button(motion: { mannequin.isTimerActive.toggle() },
       label: {
          Rectangle()
          .foregroundColor(.black)
          .body(width: timerSize.width, top: timerSize.top)
          .onTapGesture(depend: 2) { mannequin.restoreGreenTime() }
       })
.keyboardShortcut(.house, modifiers: [])
.buttonStyle(PlainButtonStyle())
This button permits me so as to add a keyboard shortcut for house to behave the identical as a faucet. Curiously having a two-tap gesture hooked up to the Rectangle() poses no drawback.
I submitted the Mac construct proper after the one for iOS however initially bought a surprising rejection:
The person interface of your app just isn’t according to the macOS Human Interface Pointers. Particularly:
We discovered that the app accommodates iOS contact management directions equivalent to faucet and swipe.
The explanation for that was that I put again the assistance display screen with a textual content I had beforehand written with iOS in thoughts. I wanted to interchange mentions of swiping with dragging and as a substitute of tapping you might be clicking. I’ve onerous coded the textual content and formatting for now and with and #if I can change the textual content between a model for Mac and one for iOS.
Group
{
   Textual content("Setting the Timer")
   .font(.headline)
   .padding(.backside, 5)

#if targetEnvironment(macCatalyst)
   Textual content("To regulate the timer, click on on the LED digits and drag horizontally.")
   .font(.physique)
   .padding(.backside, 5)
#else
   Textual content("To regulate the timer swipe left and proper.")
   .font(.physique)
   .padding(.backside, 5)
#endif
}
As soon as I had made these modifications the Mac app was permitted in a short time.
Conclusion
I’ve skilled first hand how I can rewrite an app in SwiftUI and the good pleasure that may be had from deleting all of your crufty Goal-C code when doing so.
SwiftUI is my new love and this fashion my app is not a “youngster from one other mom”. This restores some enthusiasm in me to truly lastly actually add some long-promised “thrilling new options”. For starters I’m pondering of getting a watchOS companion app which reveals the timer and means that you can distant management it. One other concept is perhaps to retailer my presets on iCloud in order that they’re the identical on all my gadgets.
I might love to listen to from you what you consider the method of re-implementing elements of apps and even complete apps in SwiftUI.
Additionally revealed on Medium.
Associated
Classes: Updates
