
Google Slides now allows you to report a presentation with inset video out of your webcam. Every recording could also be a most of half-hour lengthy. Not do that you must flip to a third-party software or internet assembly app, akin to Google Meet, to report a presentation. As an alternative, you can begin and end the duty with nothing greater than Google Slides on a laptop computer.
As of March 2024, slide recordings could also be made by clients who use Google Workspace Enterprise Normal or Plus; Enterprise Starter, Necessities, Necessities Plus, Normal or Plus; and Schooling Plus editions.
Find out how to make a primary slide recording in Google Slides
To create a slide recording, you’ll want to make use of Google Chrome on a pc that has a digicam and microphone.
- Go to Google Slides and open your presentation.
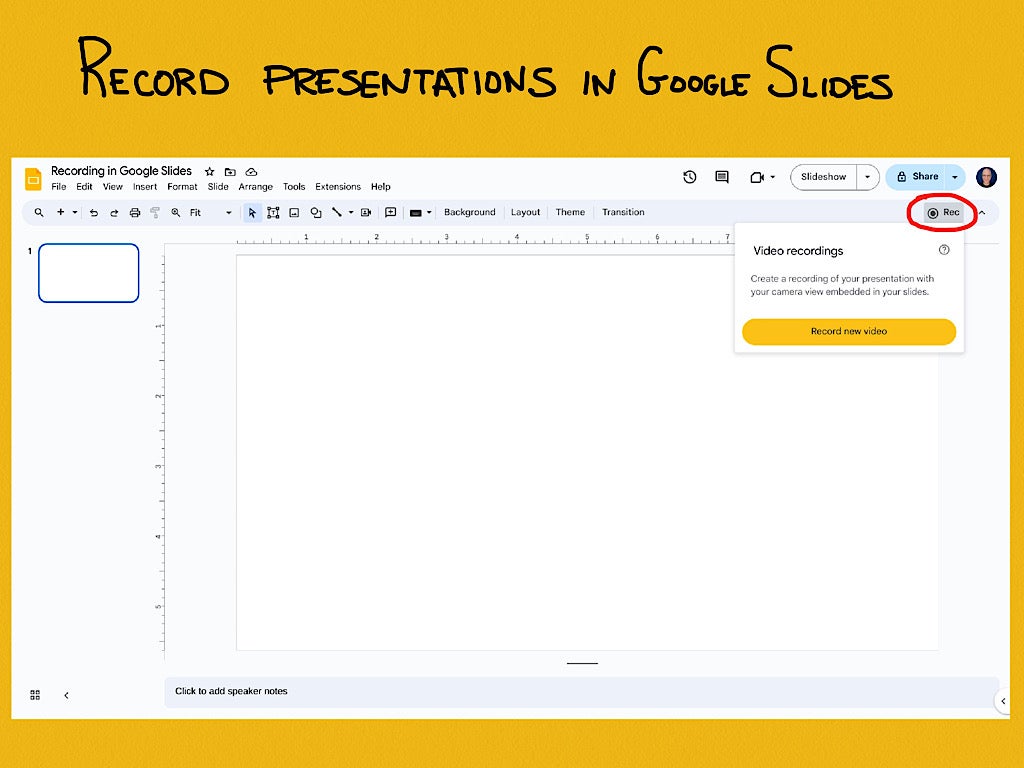
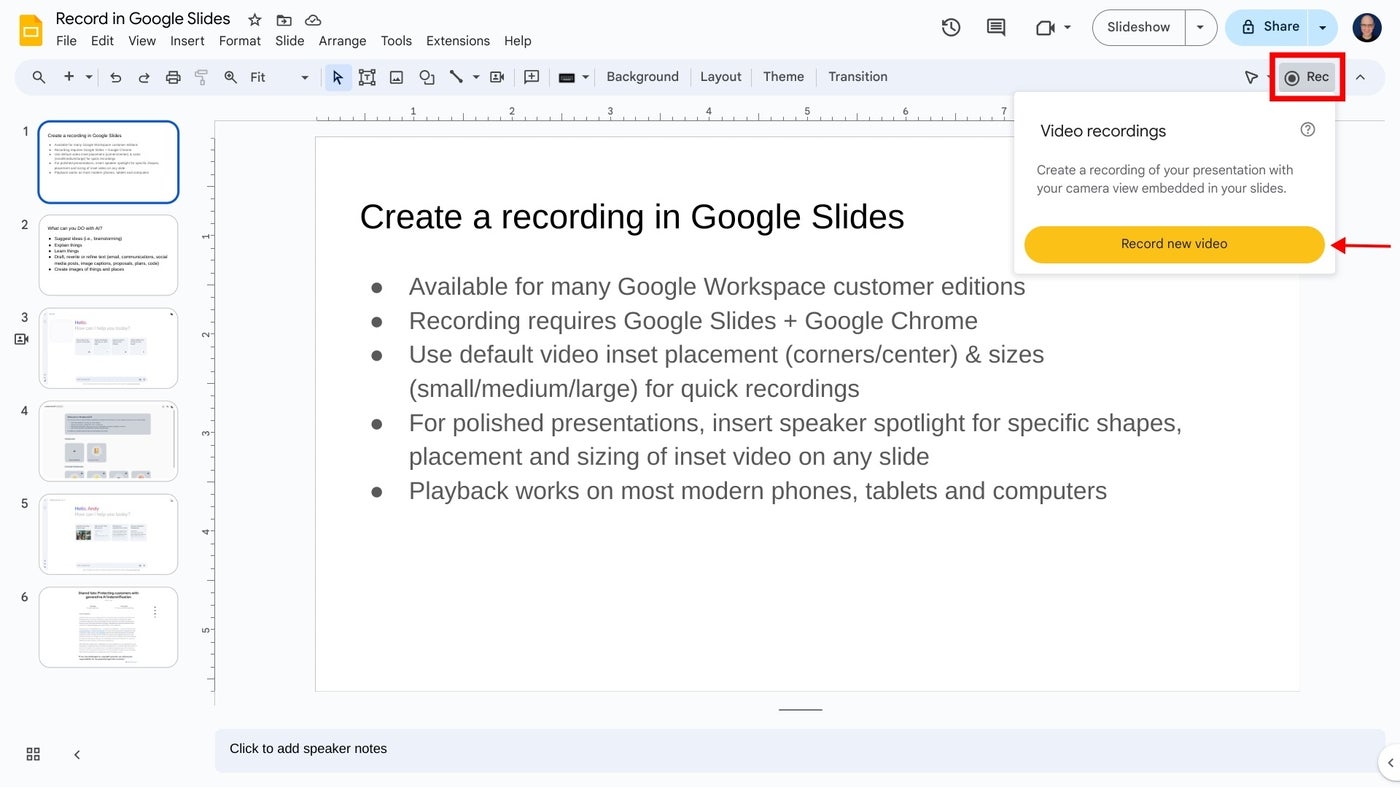
- Choose the Rec button within the higher proper space, then choose the Document new video button (Determine A).
The system will swap to the display recording interface, with recording controls displayed under your slides. By default, the system will show your inset (picture-in-picture) video in medium dimension within the decrease proper nook of a slide, since this portion of a slide is usually empty.
- Optionally, earlier than you begin recording, you would possibly alter three settings:
-
-
- Modify the situation of the inset (picture-in-picture) video body (Determine B). Choose the inset location icon, discovered to the speedy proper of the ahead slide (>) icon, to maneuver the situation to be any of the corners or middle space of a slide.

Determine B: Alter the default video inset location (decrease proper) and dimension (medium) utilizing the controls proven within the crimson field, or activate speaker notes with the icon indicated by the arrow. Picture: Andy Wolber/TechRepublic - Modify the scale of the inset video body. Choose the scale icon, discovered to the correct of the video inset location icon, then select both a small, medium or giant video body dimension.
- Open speaker notes with the button discovered to the speedy left of the again slide (<) icon. It will show speaker notes on your reference whereas recording. (Ideally, you wouldn’t must seek advice from speaker notes, in order that you would as a substitute look immediately on the digicam as you report.)
- Modify the situation of the inset (picture-in-picture) video body (Determine B). Choose the inset location icon, discovered to the speedy proper of the ahead slide (>) icon, to maneuver the situation to be any of the corners or middle space of a slide.
-
- If you find yourself able to report, choose the big crimson button on the backside of the display.
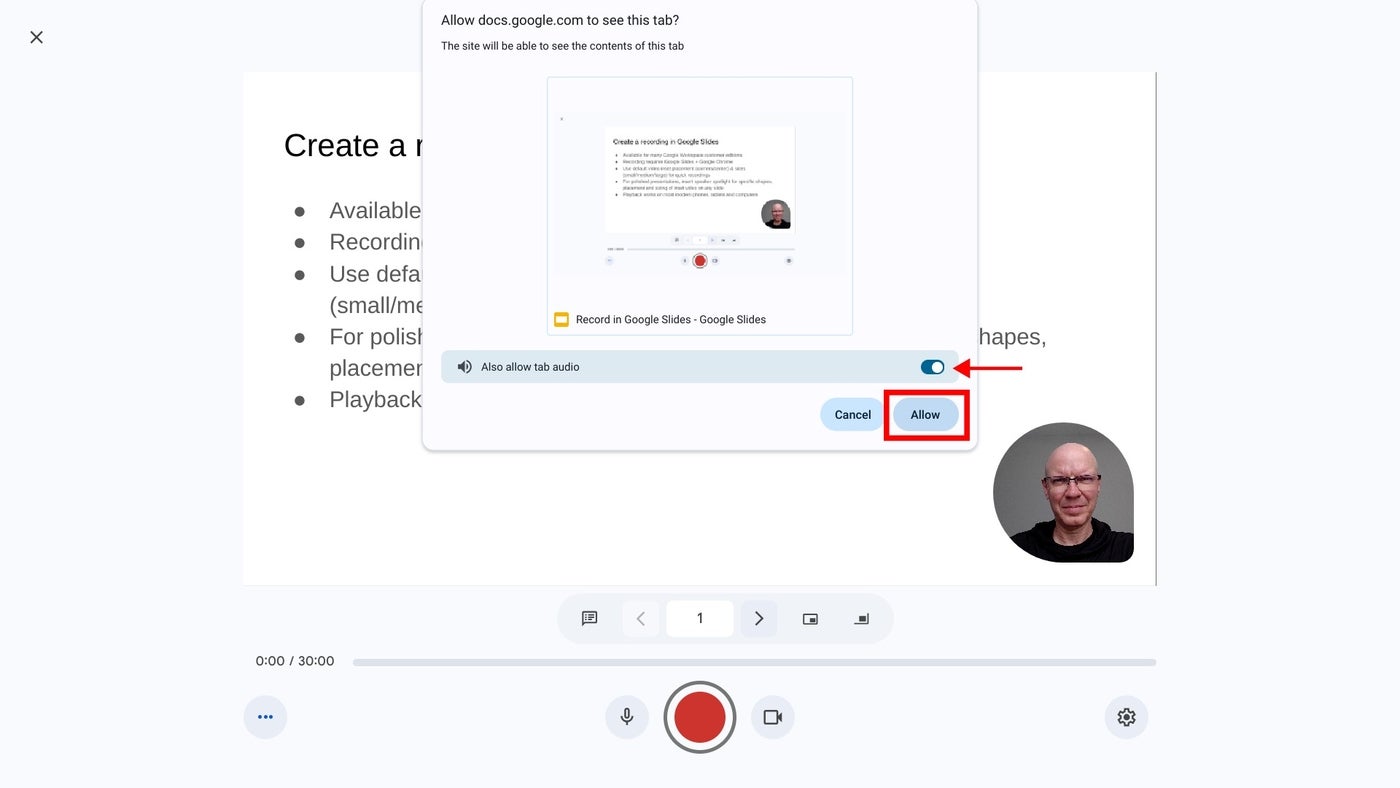
- If prompted, it’s possible you’ll want to permit entry (Determine C) to the tab, together with the digicam and microphone. For instance, when recording on a Chromebook, it’s possible you’ll be prompted to “Enable docs.google.com to see this tab?” and “Additionally enable tab audio.” Choose Enable, if prompted.
In a couple of instances, it’s possible you’ll want to go to the next hyperlinks in Chrome to regulate permissions for:
-
-
- Digital camera: chrome://settings/content material/digicam.
- Microphone: chrome://settings/content material/microphone.
-
- A quick countdown ought to show (i.e., 3, 2, 1), then your recording will start. Document your video, advancing your slides as desired.
| Observe: Whereas annotation isn’t obtainable throughout this type of recording, you can also make it in order that your cursor shows. Simply toggle the cursor icon to the left of the report button in Determine A earlier than you start! |
- To pause recording, press the big crimson button on the backside of the display.
- As soon as paused, it’s possible you’ll choose from two choices (Determine D):
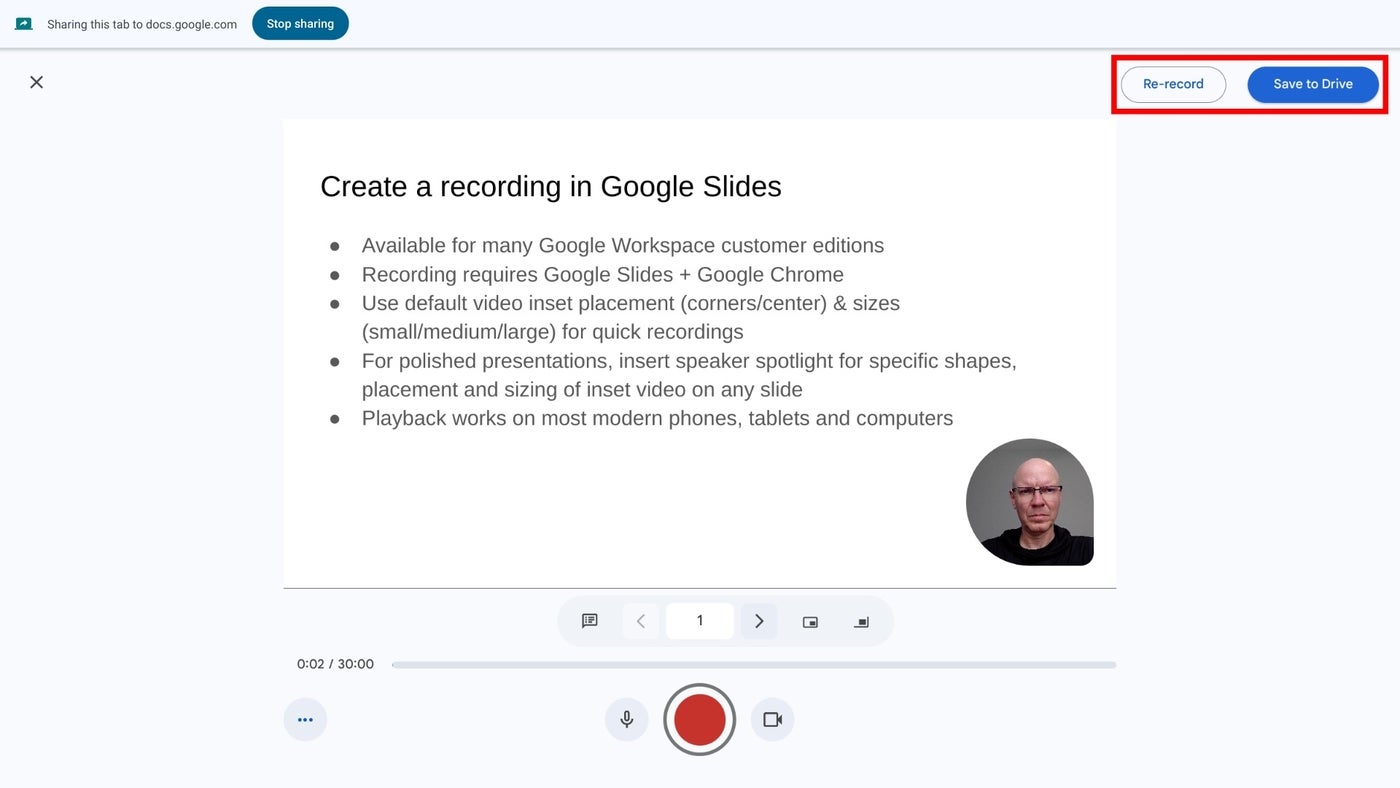
After you choose Save to Drive, wait a bit till the system signifies the file has been saved. When you go away or shut the tab too quickly, it’s possible you’ll lose your recording.
Find out how to choose inset video sizes and shapes
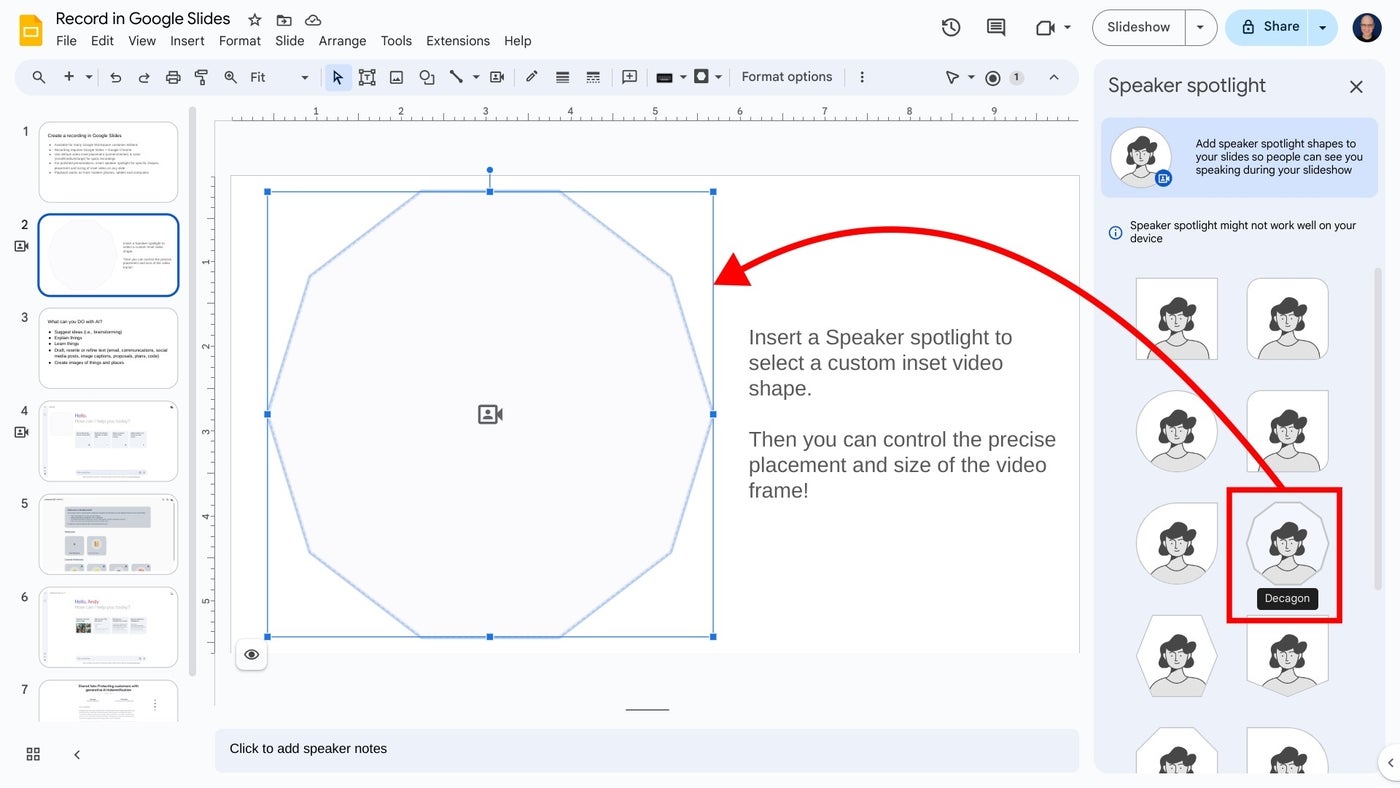
On any slide, it’s possible you’ll use the Insert | Speaker highlight possibility (Determine E), then choose a formed video body. This inserts a body the place the speaker video will show on that slide. Chances are you’ll reposition or resize the body: Choose the form, after which drag-and-drop it to maneuver it to a special place in your slide, or choose a nook and drag it to resize it.
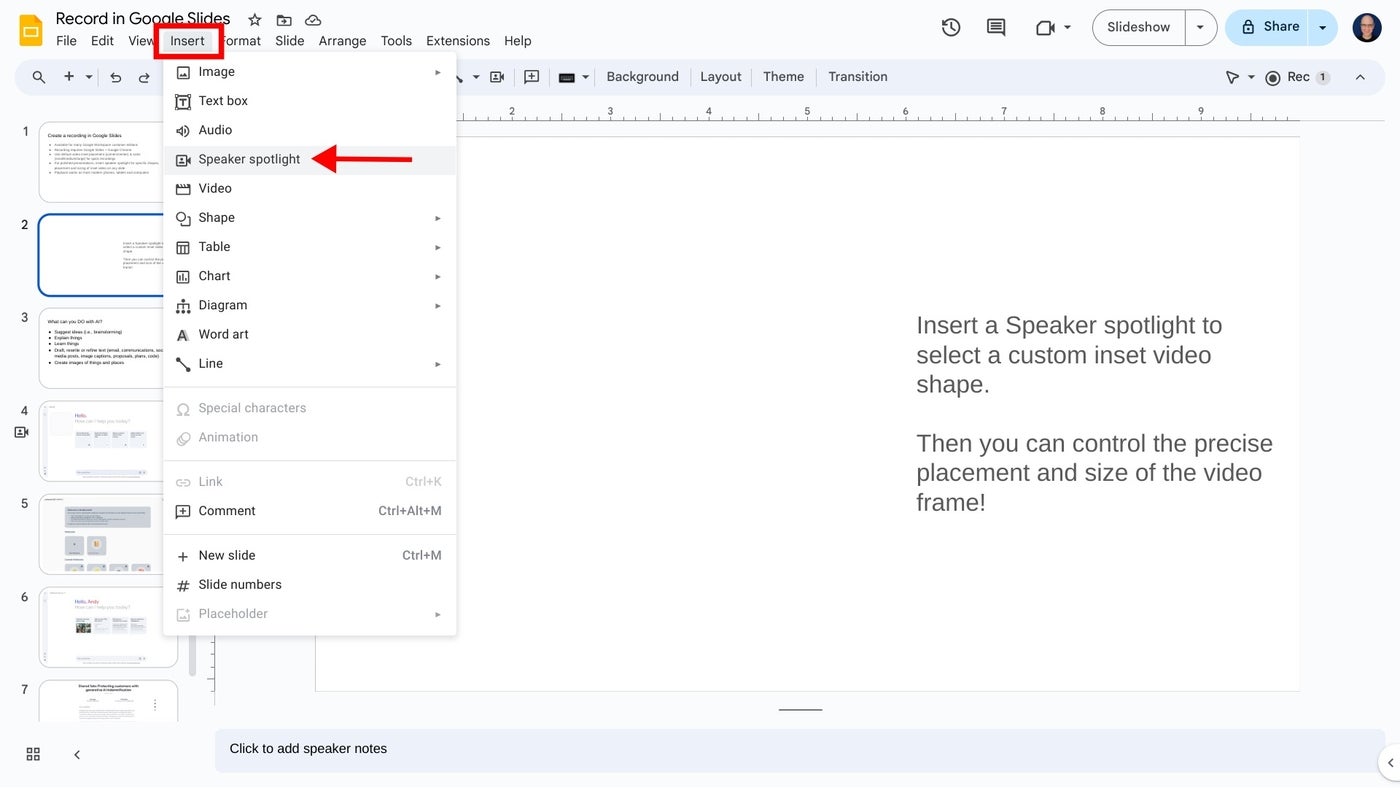
If you insert a speaker highlight form, that supplants the place and dimension you might need chosen on a primary recording. In different phrases, the speaker’s video will show in one of many corners or the middle, and within the small, medium or giant form chosen with the settings — until you’ve inserted a speaker highlight form on a web page (Determine F). Use the speaker highlight choice to convey essentially the most polished skilled impact, because it permits exact management over the form, dimension and placement of a video body.
Find out how to play, share and handle slide recordings
Chances are you’ll entry slide recordings inside Google Slides on a pc. Nonetheless, not like recording, which requires you to make use of Google Chrome, it’s possible you’ll entry and play present recordings inside Google Slides on quite a lot of fashionable browsers. For instance, the next steps all work while you use Google Slides inside both Google Chrome or Apple’s Safari browser.
To entry recordings related to a Google Slides presentation, observe these steps.
- Go to Google Slides and open your presentation.
- Choose the Rec button within the higher proper space. The recordings you’ve product of the shows will show. Importantly, the system reveals each the date and period of every recording.
- To view, share or obtain a recording, click on anyplace on the playback icon or title of the recording (Determine G). It ought to open in a brand new tab. Inside this tab, you would possibly:
-
- Choose the Play icon within the middle of the video picture to play the recording.
- Choose the Share button within the higher proper nook of the display to switch entry settings and provides different folks entry to the file.
- Choose the Obtain icon within the down arrow above a tray icon within the higher proper space of the display to obtain the file.

- Choose the three dot menu to the correct of a listed recording to:
-
- Rename a file one thing apart from the default recording title.
- Take away a beforehand made recording you now not want.
- Copy hyperlink and acquire the Google Drive URL for the recorded file.
All Google Slides recordings are saved in a Slides recordings folder on Google Drive. The recordings are saved as .webm information, which is a broadly supported internet video format. Chances are you’ll simply open and play .webm information on each Apple and Android cellphones. Any recordings you make utilizing Google Slides must be straightforward to view on virtually any machine.
Does the power to report a presentation inside Google Slides streamline your workflow? What kinds of video shows will you create with this new functionality? Point out or message me on X (@awolber) to let me know the way you utilize display recording inside Google Slides.
