

Round cells inside a group view
Reaching the purpose is comparatively simple, but when you do not know what is going on on within the background it’ll be tougher than you’d assume first. So let’s create a brand new venture add a storyboard with a UICollectionViewController, drag a UIImageView contained in the cell, resize it, add some constraints, set the cell identifier.
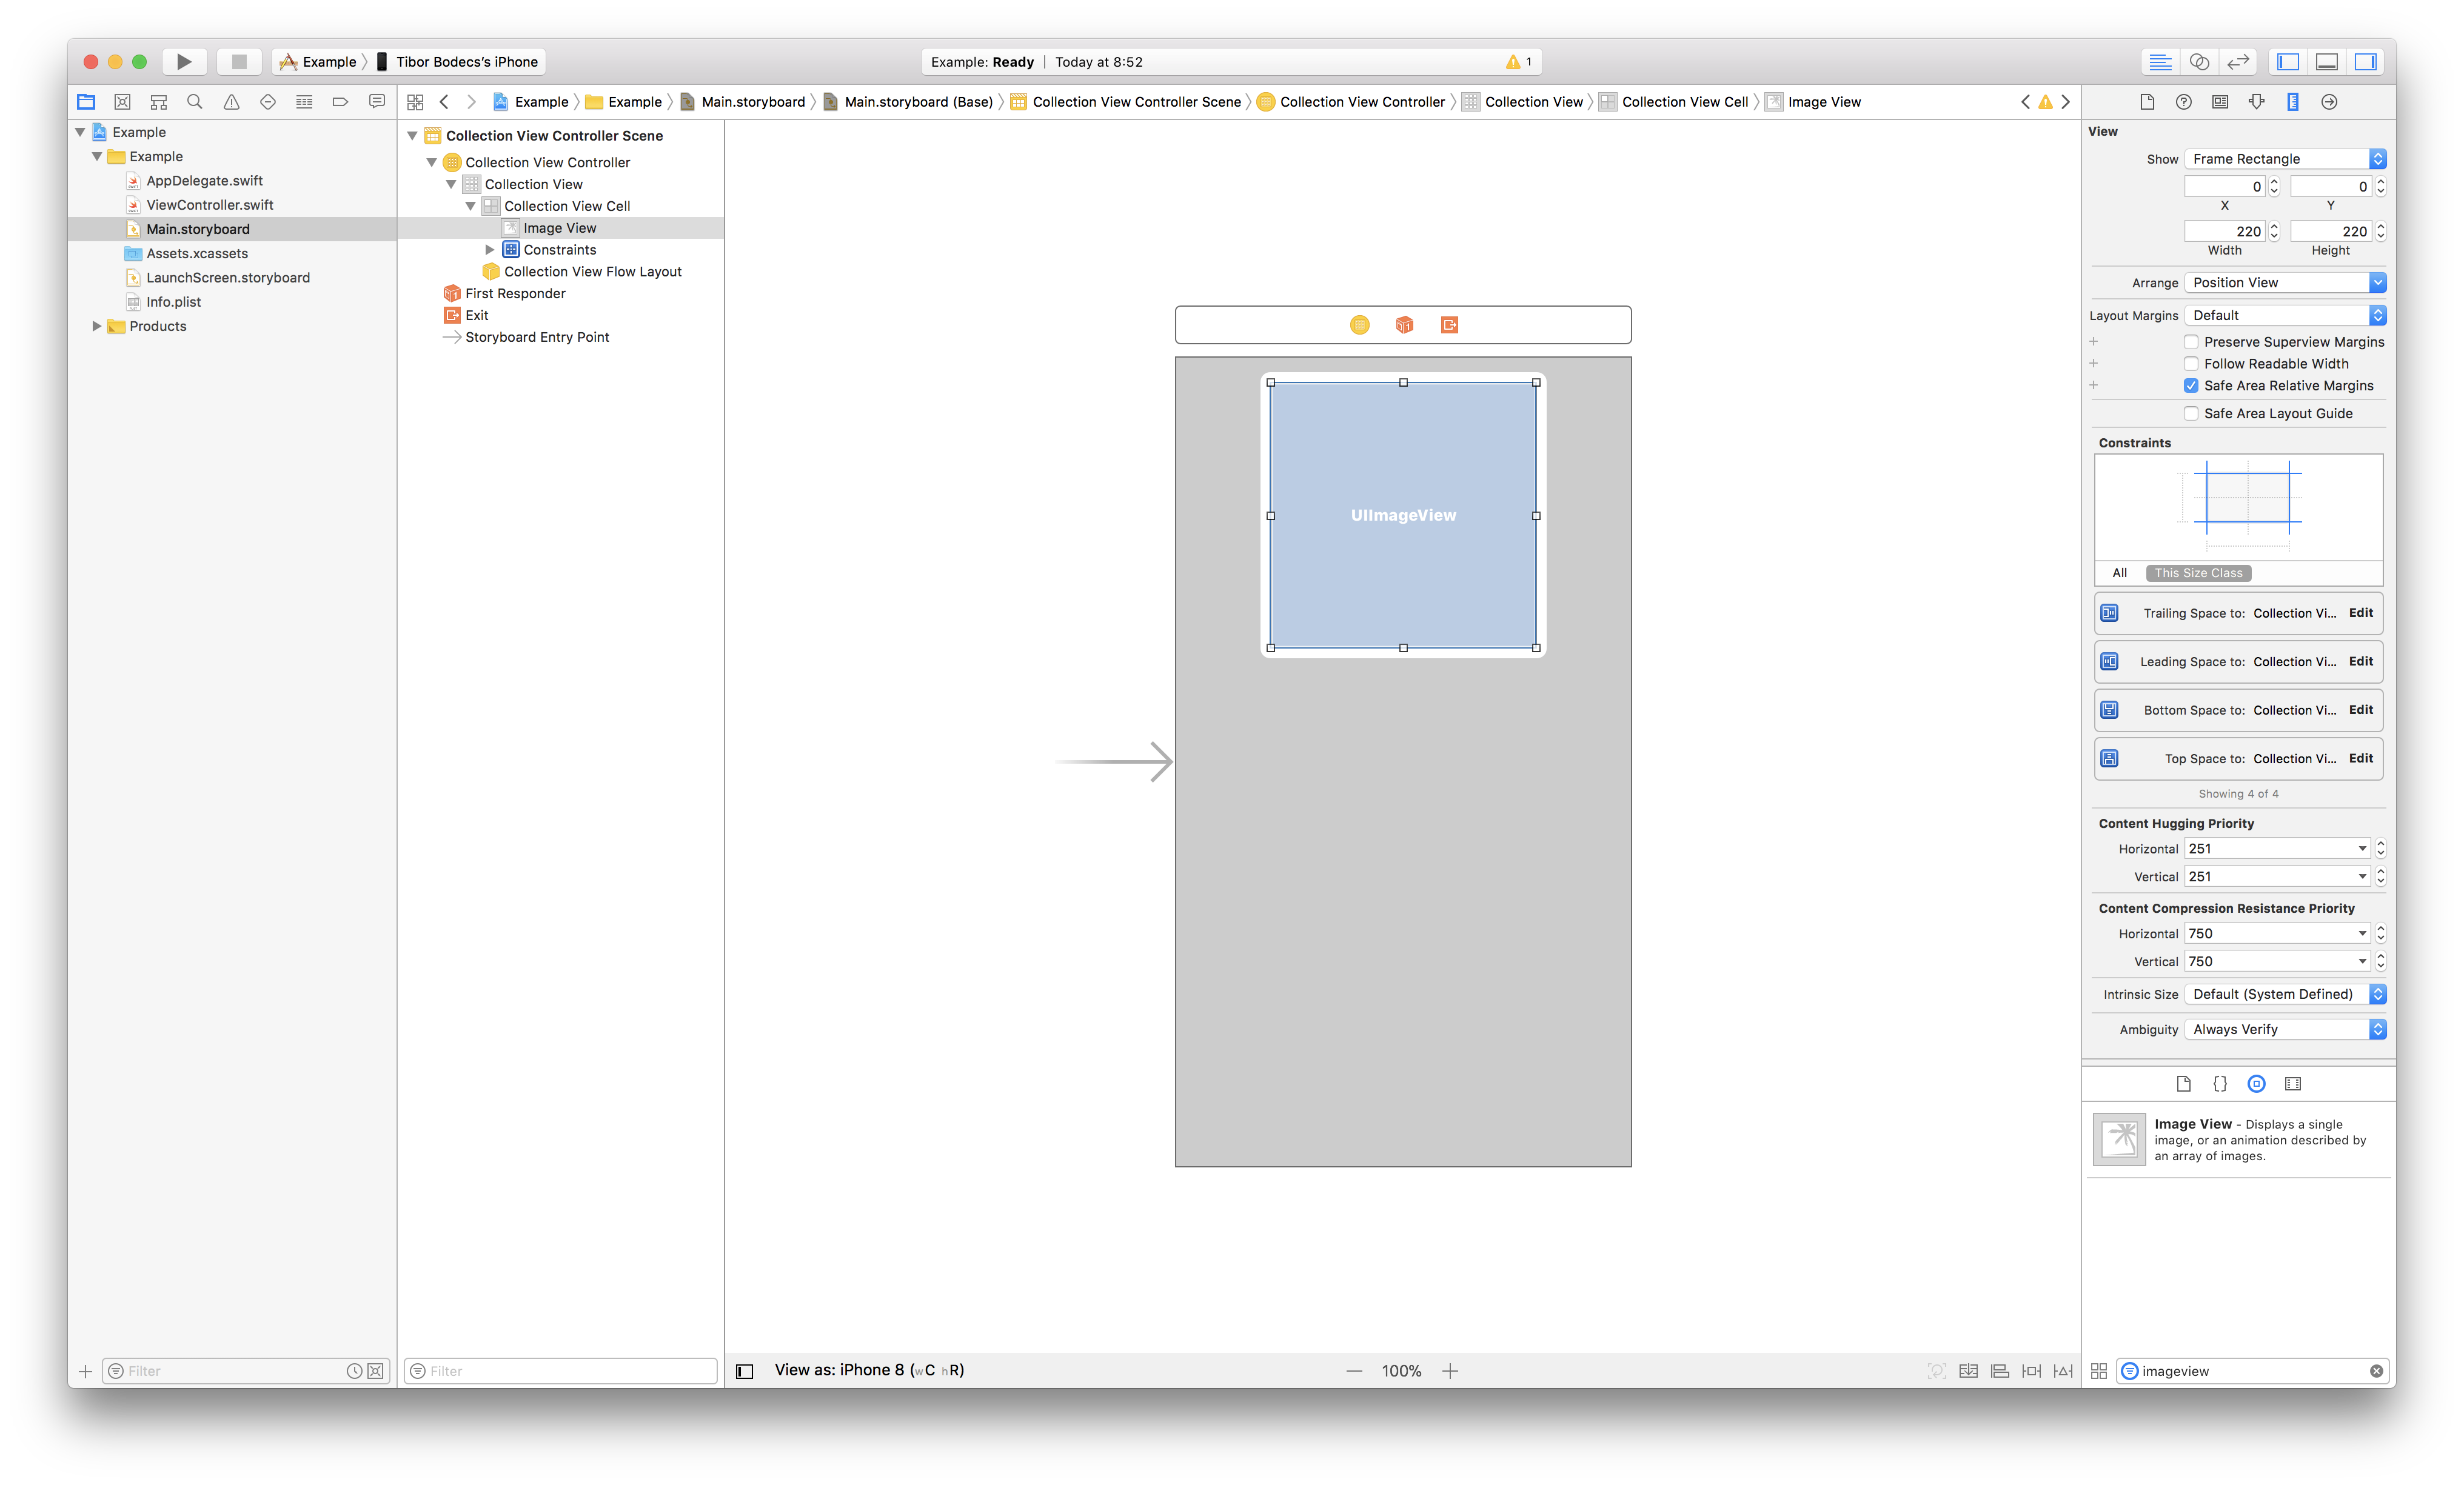
It ought to look one thing just like the picture above. Nothing particular only a easy UI for our instance software. Now seek for some random picture, add it to the venture and let’s do some actual coding. First I am going to present you the little trick inside the cell subclass.
class Cell: UICollectionViewCell {

    @IBOutlet weak var imageView: UIImageView!

    override var bounds: CGRect {
        didSet {
            layoutIfNeeded()
        }
    }

    override func awakeFromNib() {
        tremendous.awakeFromNib()

        imageView.layer.masksToBounds = true
    }

    override func layoutSubviews() {
        tremendous.layoutSubviews()

        setCircularImageView()
    }

    func setCircularImageView() {
        imageView.layer.cornerRadius = CGFloat(
            roundf(Float(imageView.body.measurement.width / 2.0))
        )
    }
}
Are you able to see it? Sure, you need to override the bounds property. As the subsequent step now we have to write down the controller class with some fundamental information supply for the gathering view and with the correct assist for the rotation strategies. 🤓
class ViewController: UICollectionViewController {

    override func collectionView(
        _ collectionView: UICollectionView,
        numberOfItemsInSection part: Int
    ) -> Int {
        30
    }

    override func collectionView(
        _ collectionView: UICollectionView,
        cellForItemAt indexPath: IndexPath
    ) -> UICollectionViewCell {

        let cell = collectionView.dequeueReusableCell(
            withReuseIdentifier: "Cell",
            for: indexPath
        ) as! Cell

        cell.imageView.picture = UIImage(named: "Instance.jpg")
        cell.imageView.backgroundColor = .lightGray

        return cell
    }

    override func traitCollectionDidChange(
        _ previousTraitCollection: UITraitCollection?
    ) {
        tremendous.traitCollectionDidChange(previousTraitCollection)

        guard
            let previousTraitCollection = previousTraitCollection,
            traitCollection.verticalSizeClass != previousTraitCollection.verticalSizeClass ||
            traitCollection.horizontalSizeClass != previousTraitCollection.horizontalSizeClass
        else {
            return
        }

        collectionView?.collectionViewLayout.invalidateLayout()
        collectionView?.reloadData()
    }

    override func viewWillTransition(
        to measurement: CGSize,
        with coordinator: UIViewControllerTransitionCoordinator
    ) {
        tremendous.viewWillTransition(to: measurement, with: coordinator)

        collectionView?.collectionViewLayout.invalidateLayout()

        coordinator.animate(alongsideTransition: { context in

        }, completion: { context in
            collectionView?.collectionViewLayout.invalidateLayout()

            collectionView?.visibleCells.forEach { cell in
                guard let cell = cell as? Cell else {
                    return
                }
                cell.setCircularImageView()
            }
        })
    }
}

extension ViewController: UICollectionViewDelegateFlowLayout {

    func collectionView(
        _ collectionView: UICollectionView,
        structure collectionViewLayout: UICollectionViewLayout,
        sizeForItemAt indexPath: IndexPath
    ) -> CGSize {
        .init(
            width: collectionView.body.measurement.width/3.0 - 8,
            peak: collectionView.body.measurement.width/3.0 - 8
        )
    }
}
In case you are conversant in assortment views, you may ask why am I doing this tutorial? It is so easy. It simply works, proper? No, truly with out the overridden bounds property the instance would look one thing like this on the left aspect. 😢
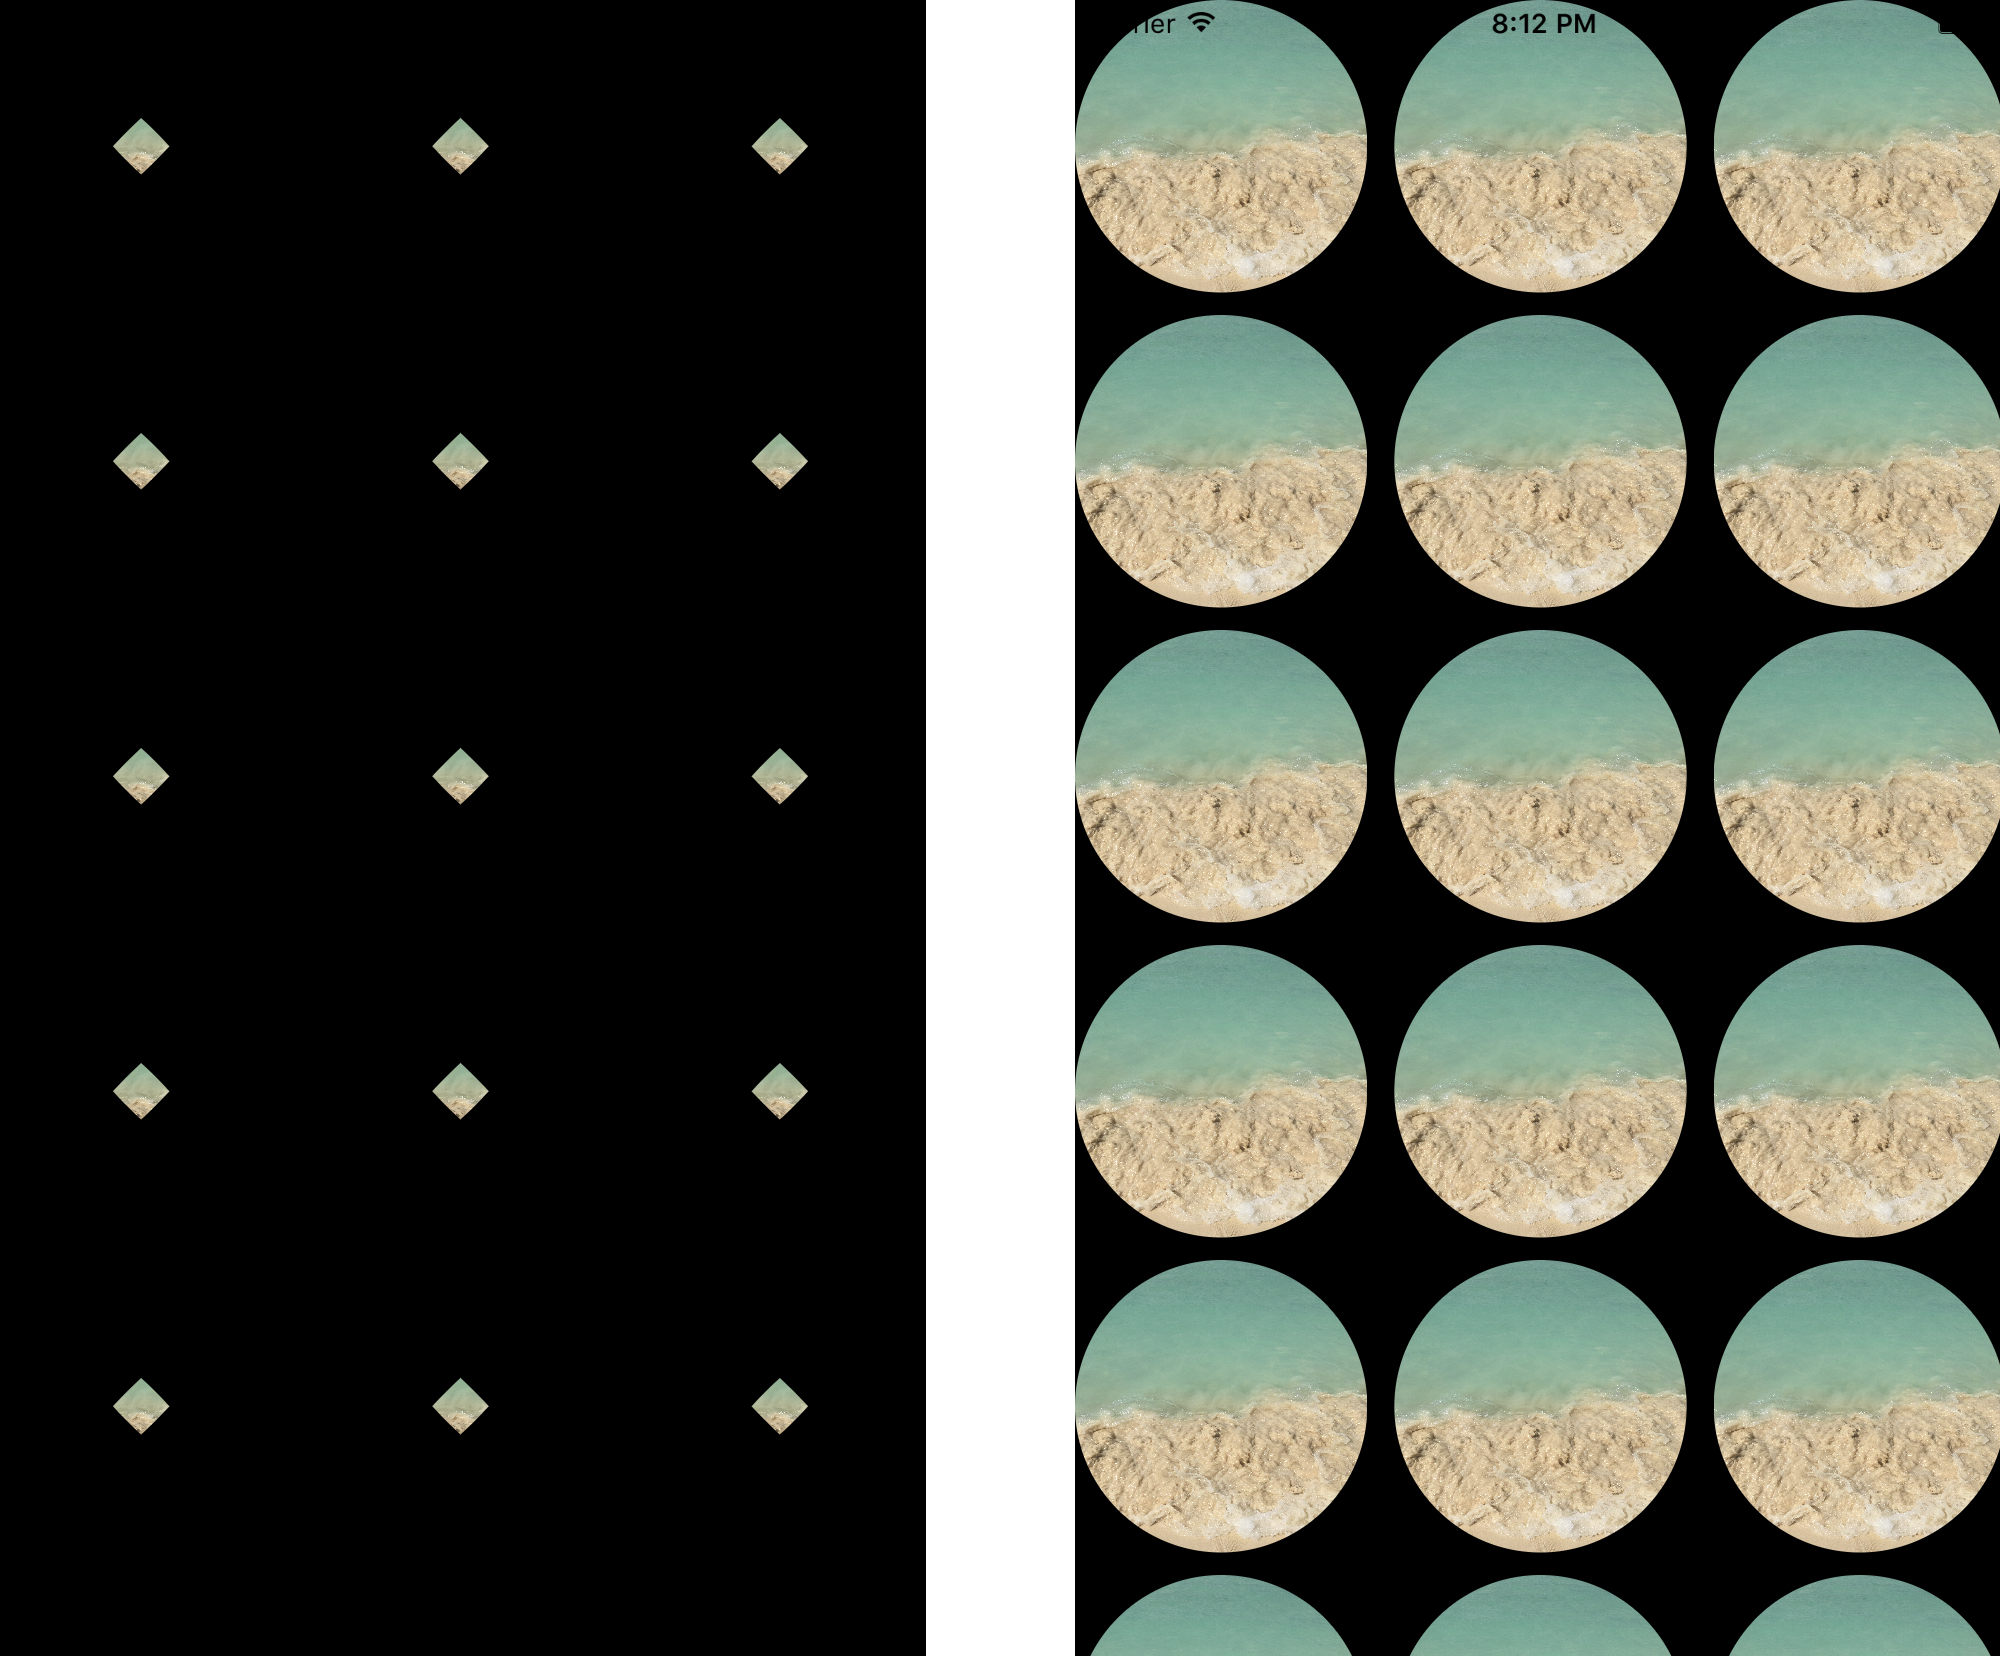
Humorous, huh? The picture on the precise aspect is the precise outcome with the overridden bounds, that is the anticipated conduct. Scrolling and rotation goes to be actually unusual in the event you do not override bounds and you do not reset the cornerRadius property for the seen views. You may ask: however why? 🤔
Layers, springs & struts and a few clarification
Apple nonetheless has “Springs & Struts” primarily based code inside UIKit. Because of this body and certain calculations are occurring within the underlying system and the constraint system is making an attempt to work arduous as nicely to determine the correct measures.
“Springs & Struts” must die!
Whereas there’s an init(body:) technique, or a required init(coder:) these structure issues will suck as hell. I actually like Interface Builder, however till we can’t get a advantageous device to create nice person interfaces IB goes to be simply one other layer of potential bugs.
This situation will not even be there in the event you create the cell from code solely utilizing auto structure constraints or structure anchors! It is as a result of IB creates the cell primarily based on the body you gave in whilst you designed your prototype. However in the event you neglect init(body:) and also you simply create a brand new UIImageView occasion and let auto structure do the arduous work, the structure system will clear up the whole lot else. Verify this.
class Cell: UICollectionViewCell {

    weak var imageView: UIImageView!

    required init?(coder aDecoder: NSCoder) {
        fatalError("init(coder:) has not been applied")
    }

    override init(body: CGRect) {
        tremendous.init(body: body)

        translatesAutoresizingMaskIntoConstraints = false

        let imageView = UIImageView()
        imageView.translatesAutoresizingMaskIntoConstraints = false
        addSubview(imageView)
        imageView = imageView

        imageView.topAnchor.constraint(equalTo: topAnchor)
        imageView.bottomAnchor.constraint(equalTo: bottomAnchor)
        imageView.leadingAnchor.constraint(equalTo: leadingAnchor)
        imageView.trailingAnchor.constraint(equalTo: trailingAnchor)
    }

    override func layoutSubviews() {
        tremendous.layoutSubviews()

        imageView.layer.masksToBounds = true
        imageView.layer.cornerRadius = CGFloat(
            roundf(Float(imageView.body.measurement.width/2.0))
        )
    }
}
Clearly it’s important to write extra code, register your cell class manually contained in the controller class and also you additionally need to override the layoutSubviews technique contained in the cell, nevertheless it’ll work as it’s anticipated. 🙄
collectionView?.register(Cell.self, forCellWithReuseIdentifier: "Cell")Anyway, after you register the programmatically created cell you will have a pleasant approach of displaying round pictures. Utilizing this method is kind of tough, nevertheless it positively works in each case. You possibly can obtain the instance from The.Swift.Dev. tutorials on GitHub.
