
Introduction
With the speedy development in Machine Studying and Deep Studying web site purposes, builders are on the fixed search for new Internet Frameworks that make constructing these web site purposes a lot simpler. The recognition of Knowledge science purposes has gone up, thus an increase in new Frameworks. Builders create quite a few new frameworks that show useful in developing these web site purposes. And one such Framework is NiceGUI. On this article we shall be specializing in this Framework and how you can construct easy purposes with it.
Studying Aims
- To grasp NiceGUI
- Be taught to put in writing Primary Parts with NiceGUI
- Perceive the working of Worth Bindings
- Working with NiceGUI to show knowledge in UI
- To construct purposes with NiceGUI
This text was printed as part of the Knowledge Science Blogathon.
What’s NiceGUI?
NiceGUI is a simple-to-use Python-based Internet-UI Framework, with the aim of creating creating Frontend purposes simple in Python. NiceGUI Framework’s UI parts are primarily based on Vue and Quasar. Good GUI comes with many ready-to-use parts. It even permits worth binding between completely different parts. NiceGUI allows simple show of a variety of plots. Its builders selected to construct it on high of the Quick API Framework for its quick efficiency and user-friendly interface.
The styling in NiceGUI will get change with CSS, Tailwind, and Quasar. By default, it permits customizable styling. Use NiceGUI to construct from quick scripts to dashboards to full robotics initiatives and even Machine Studying web site purposes.
Among the options embody:
- Preloaded with ready-to-use GUI parts like buttons, labels, checkboxes, sliders, switches, and many others
- Emoji favicon, SVG and base64 help
- Gives simple knowledge binding
- Constructed-in Timer for refreshing the info
- Capable of render 3D scenes, plot graphs
- Can simply show Pictures and Movies
- It makes it simple to customise the pages and layouts and has built-in help for Tailwind CSS
Putting in NiceGUI
Obtain NiceGUI like different regular Python packages with pip. The next Python’s pip command will NiceGUI and even installs the dependencies it depends on.
pip set up niceguiObserve that the NiceGUI even supplies a Docker Picture to check its options with out downloading it to the machine. Let’s have a look at some instance code:
from nicegui import ui


ui.label('Welcome to NiceGUI!')
ui.button('Click on Right here', on_click=lambda: ui.notify('Button Pressed'))


ui.run()
To work with NiceGUI, we have to import the library nicegui. We are going to use three capabilities from nicegui right here
- label(): Use this perform to show textual content on the UI
- button(): This perform is for making a clickable button for the UI.
- notify(): A popup on the backside will show no matter is written on this perform.
Let’s run the code and see the output under
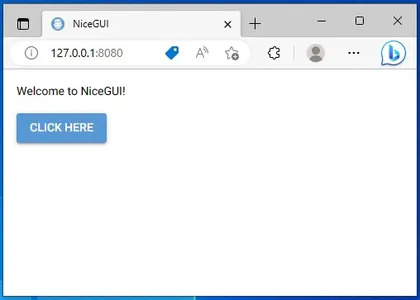
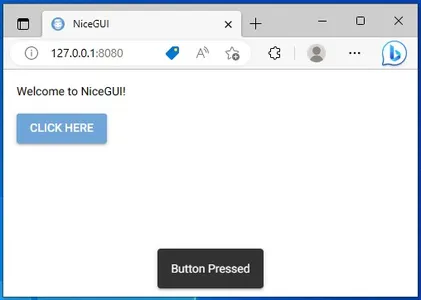
The applying will be accessed from PORT 8080. We see {that a} button Click on Right here is current right here. Upon clicking that button, a popup displayed telling that the Button Pressed
Primary Parts of NiceGUI
On this part, we’ll look into a number of the fundamental parts which we’ll create with the NiceGUI framework.
Icons and Hyperlinks
Let’s begin with displaying Icons and Linking web sites to texts within the UI
from nicegui import ui


ui.label('Show Icon')
ui.icon('fingerprint', coloration="major").lessons('text-5xl')
ui.hyperlink('NiceGUI on GitHub', 'https://github.com/zauberzeug/nicegui')


ui.run()
Features
Create the next capabilities from the above code:
- The perform “icon()” permits us to show Icons on the UI. To show an Icon, we have to present an Icon identify. This perform depends on Quasar’s QIcon. The colour choice will be specified utilizing CSS, Quasar, or Tailwind coloration. The dimensions choice is decided by the lessons() methodology, utilizing CSS items.
- The perform “hyperlink()” allows us to assign hyperlinks to textual content within the UI. First, we specify the textual content that ought to be linked, adopted by the corresponding web site URL.
Working the code will end result within the under output
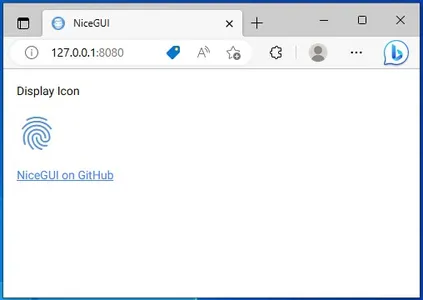
We see that the fingerprint icon is displayed on the display screen. Additionally clicking on the “NiceGUI on GitHub”, will redirect us to NiceGUI’s GitHub Web page.
Choice Parts
NiceGUI has completely different choice parts like Toggle Containers, Radio Picks, and Test Containers. The under code comprises all these parts imported from NiceGUI.
from nicegui import ui


ui.label('Toggle Field')
toggle = ui.toggle([1, 2, 3], worth=1)


ui.label('Radio Choice')
radio = ui.radio(["one","two","three"], worth=1).props('inline')


ui.label('Dropdown Choose')
choose = ui.choose(["red","blue","green"], worth=1)


ui.label('Test Field')
checkbox = ui.checkbox('test me')


ui.run()
The capabilities within the above code embody:
- toggle(): This perform can generate a toggle field, the place we go the choices by way of an inventory of values of dictionaries containing a mapping of values to labels. When the person selects an choice, it’s saved within the toggle variable.
- radio(): This works just like the toggle() perform however right here we get radio choices to pick out
- choose(): This perform generates a dropdown to pick out a selected choice. The enter to this perform and the output worth saved is identical when in comparison with the above capabilities
- checkbox(): When the person checks the checkbox, the checkbox variable is assigned a boolean True worth.
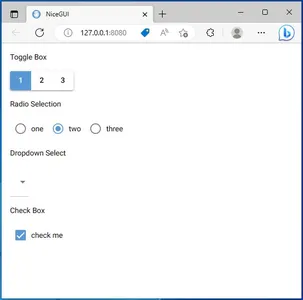
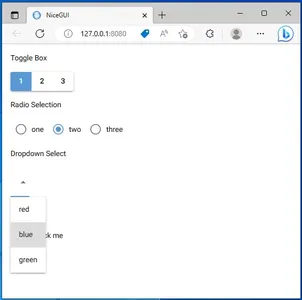
Right here we see all the choice parts that we now have created. Click on on the Dropdown Choice, a dropdown motion takes place permitting us to pick out one of many choices. These are simply a number of the parts that we now have appeared into. NiceGUI gives a variety of parts to work with in numerous situations.
Consumer Inputs and Worth Bindings
On this part, we’ll have a look at the capabilities that may enable customers to enter textual content or numerical knowledge within the UI.
from nicegui import ui


ui.enter(label="Textual content",
         on_change=lambda e: text_input.set_text('Your Enter: ' + e.worth))
text_input = ui.label()


ui.quantity(label="Quantity", worth=3.1415, format="%.2f",
          on_change=lambda e: number_input.set_text('Your Enter: ' + str(e.worth)))
number_input = ui.label()


ui.run()
Features
The capabilities within the above code embody:
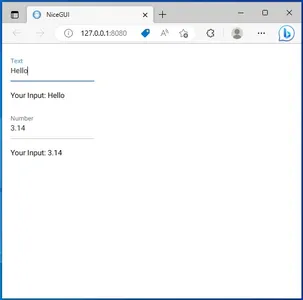
- enter(): This perform when used, will create an empty textual content field the place the person can sort the info. It has a variable referred to as “label“, which tells what sort of enter it’s anticipating from the person. At any time when the person enters an enter within the Enter field, the .set_text() perform of ui.label() prompts and shows the typed textual content on the display screen.
- quantity(): This perform works equally to the enter() perform, the one distinction is that this perform takes numbers as a substitute of textual content
The code when run, will produce the next output

Discover UI Elemts in NiceGUI
Within the pictures above, the person’s enter is displayed on the display screen when entered into the enter discipline. NiceGUI allows binding values between completely different UI parts, permitting seamless integration. Let’s discover an instance.
from nicegui import ui


ui.label("Worth Bindings")


with ui.row():
    radio1 = ui.radio([1, 2, 3], worth=1).props('inline')
    toggle = ui.toggle({1: 'A', 2: 'B', 3: 'C'}).props('inline').bind_value(radio1, 'worth')


ui.run()
Within the code above, we now have two parts (radio and toggle) grouped horizontally utilizing the ui.row() component. To group them vertically, we will use ui.column(). The toggle() perform consists of the variable bind_values(), which connects the radio choices to the toggle choices. For instance, deciding on 1 within the radio switches the toggle to A, and deciding on 2 switches it to B.

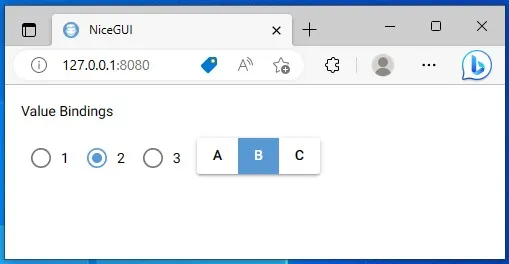
Within the above Pictures, we will clearly have a look at the worth bindings between the 2 UI parts in motion. Equally, bind_value() perform is able to working in numerous UI parts supplied by the NiceGUI.
Knowledge Parts and Graphs
On this part, we’ll see the Knowledge Parts supplied by the NiceGUI. We are going to discover how you can show tables and charts on the UI utilizing NiceGUI. Firstly, we’ll begin with displaying tabular knowledge by way of NiceGUI. The code for displaying this shall be:
from nicegui import ui
columns = [
{'name': 'Name', 'label': 'Name', 'field': 'Name', 'required': True, 'align': 'center'},
{'name': 'Employee-ID', 'label': 'Employee-ID', 'field': 'Employee-ID'},
{'name': 'experience', 'label': 'experience', 'field': 'experience'}
]
rows = [
{'Name': 'Akash', 'Employee-ID':1230, 'experience': 5},
{'Name': 'Karen', 'Employee-ID': 1245, 'experience': 10},
{'Name': 'Thanish', 'Employee-ID': 1980, 'experience': 9},
{'Name': 'Samuel', 'Employee-ID': 1120, 'experience': 8},
]
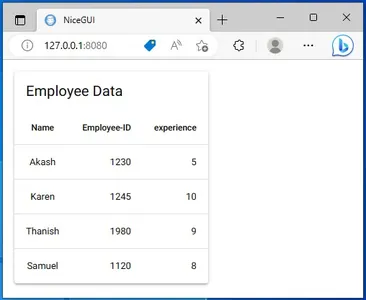
ui.desk(title="Worker Knowledge",columns=columns, rows=rows, row_key='Identify')
ui.run()To show a desk, specify the column names within the columns checklist. Every column is represented by a dictionary throughout the checklist. Embody the identify, label, and discipline values for every column (usually the identical for all). Extra key-value pairs will be supplied as wanted. For instance, the “required:True” key-value pair ensures that the Identify column requires a price for any new component added to the desk. The “align”:”heart” aligns the whole row below that column identify within the heart alignment.
The subsequent is the rows checklist. The rows checklist is the checklist of dictionaries containing values for the above columns. Right here utilizing the sector names, we offer the discipline:worth pairs within the dictionary. Then with the ui.desk() perform, we show the desk to the UI. Right here we may give the title identify for the desk. The row_key has the column identify that comprises distinctive values. Working this code will give the next output
Pandas DataFrame with NiceGUI
We will even show the Pandas Dataframe with NiceGUI. With the desk() perform itself it’s doable to show the Pandas Knowledge.
import pandas as pd
from nicegui import ui


knowledge = pd.DataFrame(knowledge={'Identify': ["Karan", "Shoaib"], 'Function': ["Developer", "Designer"]})
ui.desk(
    columns=[{'name': column, 'label': column, 'field': column} for column in data.columns],
    rows=knowledge.to_dict('information'),
)


ui.run()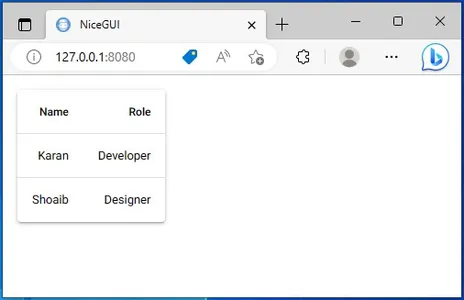
Now we’ll have a look at how you can show graphs on the display screen utilizing NiceGUI. With NiceGUI capabilities, we will show plots made by way of matplotlib on the display screen. For this, we work with the pyplot() perform within the NiceGUI, which shows matplotlib graphs on the UI. The code for this shall be:
import matplotlib
import numpy
from nicegui import ui


with ui.pyplot(figsize=(3, 2)):
    x = numpy.linspace(0.0, 10000.0, 10)
    y = numpy.log(x)
    matplotlib.pyplot.title('Log Graph')
    matplotlib.pyplot.plot(x, y, '-')


ui.run()
Right here we use the with command adopted by the ui.pyplot() perform. We even go the fig measurement to the perform. Now below the with, we write the code for plotting a graph by way of matplotlib. Right here we now have written a easy graph, the place the x-axis comprises the values from 0 to 10000 with a stepsize of 10 and the y-axis comprises the log values for them. The output when the code run shall be:
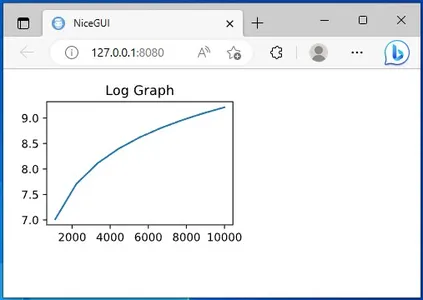
You’ll be able to see the plot on the above display screen. With NiceGUI, we not solely can show matplotlib graphs, however we even can show graphs made by way of Plotly too, which creates interactive graphs.
UseCases and Functions
NiceGUI much like different Internet Frameworks, will be useful throughout completely different growth situations, like:
- Machine Studying UI: With its multitude of parts, NiceGUI emerges as among the finest libraries for creating Frontend components for Machine Studying Functions. The completely different choice parts supplied by NiceGUI will actually turn out to be useful when coping with ML purposes that want many inputs from customers
- Speedy Prototyping: Not writing HTML, CSS, or Javascript information and having the ability to code the whole lot from displaying textual content to choice containers to graphs completely in NiceGUI, reduces the big quantity of effort for creating fast prototypes. And the quantity of parts supplied by NiceGUI helps in creating full-fledged working prototypes.
- Dashboard Functions: NiceGUI permits builders to show completely different charts simply by way of its chart parts. One good factor to notice is that NiceGUI may even present 3D Scenes. It even comes with progress bars to showcase the loading of the info. It has completely different knowledge parts to show several types of Python knowledge varieties on the display screen.
Conclusion
Builders use NiceGUI, a Python Internet Framework, to create web site purposes. NiceGUI supplies the mandatory instruments to develop a full-fledged web site with all of the frontend components utterly in Python. Now we have even seen completely different parts of NiceGUI and how you can take person inputs. Lastly, we now have gone by way of bind values to study we will bind between completely different UI parts
Some key takeaways from this text embody:
- NiceGUI comes with completely different ready-to-use UI parts.
- It supplies customers to create multi-page web sites.
- NiceGUI comes with knowledge binding constructed into it.
- Primarily based on FastAPI to serve the content material to the online.
The media proven on this article is just not owned by Analytics Vidhya and is used on the Writer’s discretion.
